Artwork Update

Acrylic and Oil Based Paints Of Various Sizes

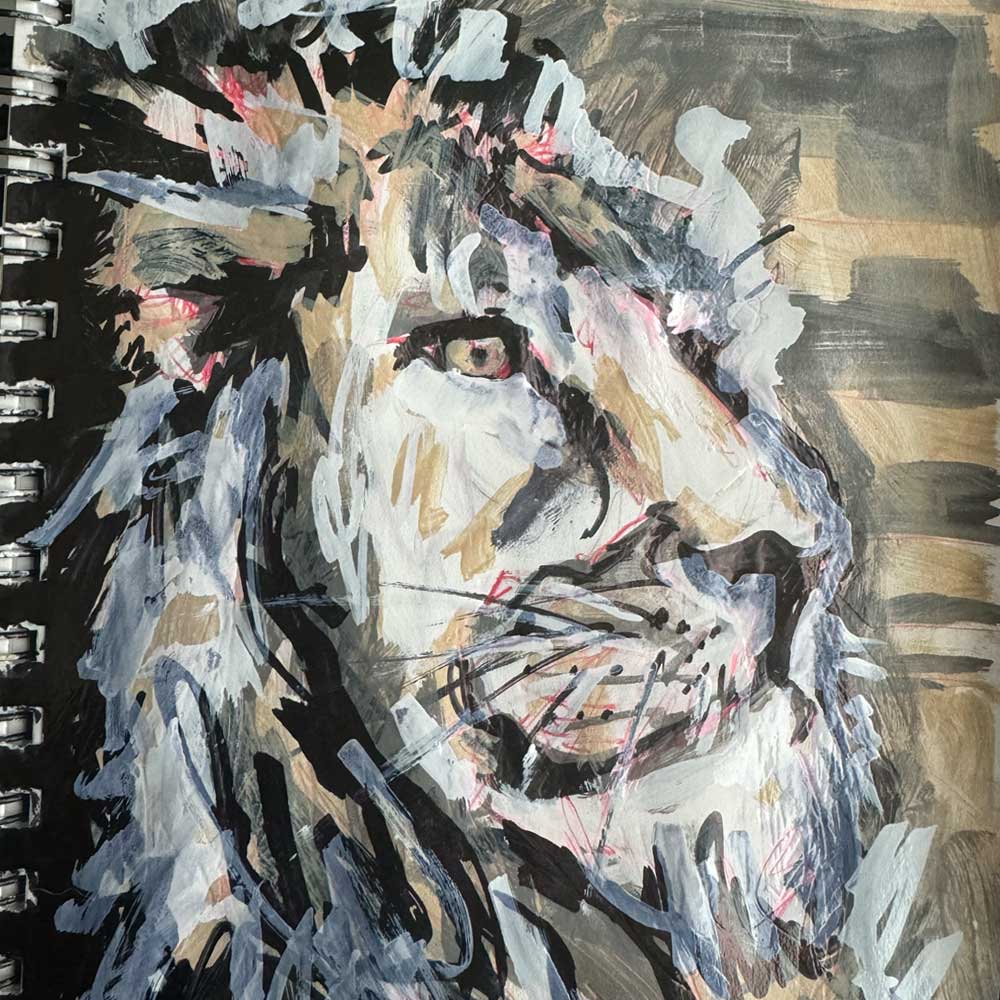
Lion In Solitude

Mixed-Media on X @salleecreates

Artwork – Mixed Media, Sketches and Artwork

It’s been awhile, let’s see what is going on, see our latest Artwork Updates on X.

I have to admit it’s been months since I shared any artwork or mixed-media projects, or provided any insight into my creative process. While I’ve shared a few marketing ads here and there, I haven’t shared anything on this scale in a while. I thought it might be interesting to share my before sketches,  unfinished work and even pieces that didn’t quite make the cut. So, here’s the idea.

20 Minutes A Day

I dedicate 20 minutes a day to my sketching, painting, mixed-media, and artwork preparation activities for new, in progress or pre-work. Most of my work is done in a few 5.5″ x 8.5″ sketchpads, which I will eventually transfer to canvas board, wood, or another medium. I’m not yet sure how I want to share these pieces moving forward; X, web or the combination of the two. This won’t be a comprehensive listing, but rather a good representation of the sketches and paintings I’m currently working on. Ultimately, I would like to showcase all of my work in some way, but for now, here’s a quick look at my artwork updates.

Mixed-Media and Artwork Updates
Switch Artwork Update

Switch

Buildings Art

Buildings

Dark Night

Dark Night

Different Perspective

Different Perspective

Art of the Human Hip

Human Hip

Human Skeletal Form

Human Form

Toroidal Field Art

Toroidal Field

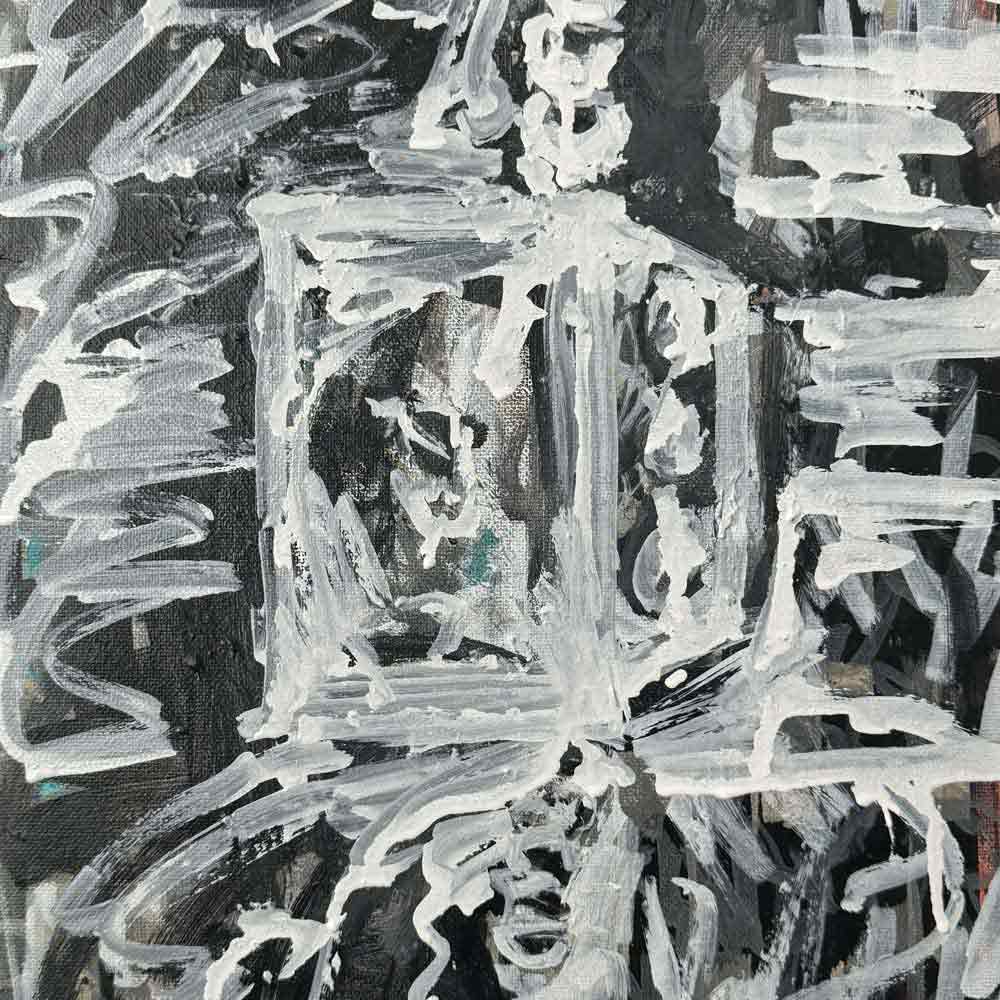
Windows

Windows

Next, you can have look over my other pieces, completed artwork, studies and mixed-media or design work projects. In closing, this is just a continuation, more of a beginning on the site. I will continue to keep you all updated on my whereabouts, what I’m working on in terms of art/artwork, as well as things happening in and around the office here or what’s on the bench.

Currently, I am focusing some energy on around 40 smaller pieces. My goal is to continue sketching for at least 20 minutes per day. I am also planning to include more pieces featuring human anatomy, various animals, boats and aircraft. For those computer people from the internet, check out the ASCII Art post… very cool.

Finally, stay tuned. In the meantime, feel free to follow my work online @salleecreates on X.com. Take a look, and follow me if you’d like. Cheers!

Latest Drawing Tools Part 2

Moleskin, Staedtler, Princeton, Liquitex and More

Moleskin Art Album

Part 2 – Pencils, Pads, Tools, Paint and More

Tech And Tools – Part 2: Latest Drawing Tools, ‘Tools of The Trade, Markers, Pencils, Precision Tools, Erasers, Brushes, Paint Markers and More’ series

Need supplies quickly? In Part 2 – Drawing Tools, we will discuss supplies that are running low and those that have been used around the shop for the longest time.

Some of these supplies have been with me for 15 years, and others for over 20 years. In previous post, we talked about the Amazon Affiliate direction. For continuity and to prepare for upcoming posts in early to mid-June about our 3D print upgrades, it’s important to have the right parts. So, let’s share the latest list of art supplies. Check out part two of our to-do list on the producer’s product page. 

Part 2, Continues

In Part2 – Latest Drawing Tools we will focus less on the items mentioned above, as they are already essential in my drawing kit. However, we will discuss easels, additional brushes, and Moleskin albums or pads. The list of supplies goes on, including math sets (squares, compass, angles), sharpeners, on-the-go pads or albums, paints, paint markers, and drawing tools (mechanical) to keep on hand.

Recent Purchases, Recommendations

Moleskin – Art Watercolor Album 3.5×5.5 inch, (1 pad, 60 sheets)
Staedtler 4H Pencils – Mars Lumograph Pencils 4H (12)
Staedtler Instrument Math Set – Writing Instrument Math Set (14)
Staedler Mechanical Pencils* – Mechanical Pencils (3)
Strathmore – Sketch Pad, 8.5×11 inch, 1 pad (100 sheets)
Luxi – Sketch Book, Top Spiral, 9×12 inch, 1 pad (100 sheets)

Princeton* – Aspen Series Paint Synthetic Brushes, Acyrlic and Oil (5)
Liquitex – Marker set – Liquitex Professional Paint Marker Set, Monochromes (3)
Liquitex Markers – *Individual – Professional Paint Marker, Carbon Black (1)
Acrylic Paint BASICS Acrylic Paint Set, Tube Set (48)

More Recommendations

First, easels are a tough, rare breed of ‘kit’ to have around the shop. I’ve used desktop easels, metal easels and composites of some kind, only to come back to the Studio H. The Studio H can be found on Blick, specifically the Blick Studio Heavy-Duty H-Frame Easel, which is more importantly on wheels! I’m going to brag on this H-frame easel for a moment.  While other easels can be found on Dick Blick or Utrecht, this easel is tough, agile and easy to put together.  It has a nice shelf for convenient storage, where you can store additional tools, rulers, or markers, especially nice to have when using those Liquitex paint markers mentioned above. It’s easy to clean, accommodates oversized work,  and sits on wheels, so maneuverability and the ‘space’ the easel consumes around the shop can be kept to a minimum.

Brushes

Next, let’s talk brushes, specifically the Princeton Catalyst Series brushes and *Golden/Utrecht acrylic paints. Occasionally, I will buy second-hand or slightly flawed brushes so that I always have the right brush for any situation. Therefore, the Princeton Catalyst and Aspen series are my go-to brushes for acrylics. I also want to mention that I consistently use Liquitex Basics-to-Advanced viscosities of paint. I stock up on Basics for commonly used colors, while opting for high-density, firm acrylics for filling, highlighting, or shadowing. It has been quite some time since I changed my paint selection, approximately 27 years ago. Feel free to browse those items in the cart, as they have been purchased multiple times.

In closing, we highly recommend the items listed on the shopping list, as they have been purchased more than three times over. In certain cases, such as the Liquitex paints, they have been purchased for over 27 years. Supply consumption varies, as supplies come and go. A never-ending cycle.  Therefore, I like to occasionally add new items to test, place on the bench, and experiment with. It’s always important to test new supplies, versus those that are necessary for immediate purchase. Discover the supplies that best suit your needs and circumstances. Enjoy and good luck with your creative endeavors. Refer to Part One for more information.

Lastly, Keep Building Your List

Let’s end with an old saying ‘No pain, no gain’. I would venture to say. While building your supply list can be daunting and suppliers change, solving the problem of the list is the fun part. Sometimes things work out, while others should remain in the trash receptacle (or, on the never buy list).  It’s part of being a consumer, which involves consumption, right? In all honesty, this part can be fun, so make it enjoyable! Turn it into a game if you choose, wheel and deal.

Before we move off of the new supplies. I don’t want to forget a few other upgrades around the office to share such as the GTRacing Mesh Back Chair a new upgrade here in the office… long awaited change, and time for the older model to be replaced with a new mesh back gaming chair. The Fisher Space Pen for you outer space fans… posted back in January 2021. Awesome pen, I use it on the road for any and all writing needs! Check back in a few weeks for updates. Items to look out for on the list include Moleskin pads or albums, and a few other goodies. Spoiler alert: there are additional 3D print upgrades, parts, and a new series just around the corner… less than a week away!

Latest Drawing Tools

SHARPIE, Sakura, Ohuhu, Prismacolor and More

Ohuhu Marker Set

Illustration Kit – Markers, Pencils, Brushes, and More

Tech And Tools – Part 1: Latest Drawing Tools, Tools of The Trade

What will it be? Markers, pencils/coloring pencils, precision liners, erasers, brushes, paint markers; need more? Come shop online with me. We can look for refills, thin-liners, chiseled markers and new additions like the Ohuhu Alcohol Markers to expand our toolkit.

Amazon Affiliate Shopping List

Let’s talk about the Amazon Affiliate Shopping list. Recently, I’ve included the option to share Amazon products as an affiliate. This allows me to share products and recommendations for items I personally purchase for the shop. In this instance, we will discuss thin-liners, markers, and line tools, in order to provide our thoughts on products you may be interested in purchasing. 

Even better, think of it  as a reference guide with recommendations for items that have yet to be purchased. For those who have already made selections, a bookmark could be useful to have around your work area, especially if you aspire to be a hobbyist or professional designer.  Regardless, this post serves  as a vehicle to promote Amazon Affiliate products via Amazon, among others. As you may have noticed, we do not heavily promote our content on social media, so the content in this first part is an effort to share our experiences with products in the market or perhaps just an exercise in futility.

In the coming weeks, I will be delving into each post, updating product links, and reposting links to products as *an affiliate  to assist shoppers like you in purchasing goods and services that we recommend. The shopping list, or ‘shop with us page’ is now available here. This is particularly important for new posts, links, and future posts to share, add value or share our experiences with the products and services we use.

TPU Action

Moving forward with the latest drawing tools, let’s consider the items mentioned in our early June posts regarding ‘TPU Action‘. A list of parts has been provided for you to browse and purchase for your shop! Take note of my mistakes (they could save you money) or simply think of it as putting money back in your pocket. Additionally, for those of you who are able to buy supplies through Amazon, or Prime, I will be sharing discount codes at a later date (not toady, as I’m currently working to find deals and affiliate links). I will also be mentioning specific days and time periods when Amazon offers special promotions. Speaking of, Prime Day 16th & 17th is approaching quickly. Hopefully, the purchaser page will be a helpful too, providing an easier way to recommend products and services through Amazon. 

Latest Suppling List

Let’s cover the art supplies in two part series, pens, markers, and erasers. Secondly, sharpeners, on-to-go pads, paints, paint markers and drawing (mechanical) tools to have around…

Sharpie – Markers – Variety Pack (6)
Sakura Pigma – Pro Brush Pens (6)
Sakura Pigma Micron – SAKURA Pigma Micron Pens (1)
Ohuhu – Ohuhu Alcohol Brush Markers (168)
Ohuhu – Ohuhu Alcohol Blenders (6)
TFIVE – Acrylic Marker Pens (2)

Prismacolor – Markers, Pencils and Tools
Marker Set Fine/Chisel – Prismacolor – Double-ended Markers (24)
Marker Set Fine/Brush – Prismacolor – Double-ended Markers (12)
Erasers – Prismacolor – Magic Erasers (12)
Colored Pencils – Prismacolor – Eraseble Colored Pencils (24)
Pencil Set – Prismacolor – Graphite Pencils With Erasers & Sharpeners

Wrap up

Finally, all items on our shopping list can be purchased above or on our shopping list. These items have been purchased within the last 4 months.  Typically, they are considered must-haves, essential for use in and around the office. For example, it is useful to have various types of Sharpies – thin-liners, regular barrel type (more common size with a fine tip), and heavy-duty chiseled tips. Sharpies are almost required in the #markers space for marking bed plates and prints. There are areas of opportunity when it comes to nibs, nobs, and globs. For those in desperate need, they provide a simple way to write on most surfaces. See Part Two.

Part Two for your convenience. If you are going into art school, are a hobbyist, or need a school art supply list, please bookmark this series. It will help you maintain and improve your supplies list. It serves as a convenience reminder of products we have recommended in the recent past.

Lastly, keep your supplies fresh, stocked up and within reach. Keeping office art supplies stocked can be a huge task, with dried paint tubes, markers, and broken tips. As the post mentioned, it can sometimes fee like an exercise in futility.

Fix 3D Prints and Plastics

Be Creative Without the Hassle

Active Fix

Quick Fix With Super Glue and Baking Soda

Strong Adhesives, Baking Soda and Spray Activator/Hardener Light

Fix plastics, wood lures, wood carvings and more. Fix 3d Prints and Plastics better than traditional fillers or bonding agents.

Adhesives, Clean Up/Deburring
Starbond Kit – Starbond Kit – Glue & Activator Starbond – Super Fast Thin Glue JB Weld – J-B Weld Bonder (2) Pack AFA Tooling – AFA Tooling Deburring Tools
Dremel Tool – Dremel High Performance Rotary Tool Kit
In A Tight Spot, Choose Super Adhesive and Baking Soda

Need a quick fix, while out fishing in the field? Or did a new 3D print break during the clean up process? What should you do now? For a quick fix, simply grab some extra strength glue, our choice, Starbond, Starbond activator, baking soda and start the filling process. This method works on wood, plastics, and more. By using baking soda as the ‘filler’ and the super adhesive as the bonding agent, you’ll have a quick fix in no time. 

If you need to clean up your 3D Printables, fix drones and drone parts, clean up or deburr plastics and filler using super adhesives and baking soda, deburring tools are a must. When producing items from plastics or resin compounds such as wood, metals and plastics, the production process isn’t perfect, leaving you with work post production. Tasks like, trimming for metal stamping or removing travel or supports in the 3D printing process, require specific tools. We  recommend AFA Deburring Tools for hand scraping and clean up, as well as the Dremel Rotary Tool for tile, clay, woods and metals. These tools are handy to have around the shop for various tasks.

Finally, for those tough jobs, or bonds, try JB Weld (J-B Weld Amazon Store). There are many applications for JB weld. Whether it’s loose or broken tiles, outdoor furniture, or any other project, JB Weld Epoxy and adhesives will create a strong and lasting bond using chemical bonding resins.

For a comprehensive list of all products mentioned above, please refer to our affiliate shopping list for ideas, product information, and more. Here are some products you may want to consider! Please note that this is just one method of fixing plastics; it was a test to demonstrate the effectiveness of the adhesive and baking soda powder.

TPU Upgrade Process

Install New Direct Drive, Build Plate Upgrades

Completed Build

TPU Action – Upgrade Process

Max Neo Upgrades: The Upgrade Process, Part of the TPU Action Series

Now, let’s discuss the Creality Max Neo 3D Printer Upgrade – unboxing, teardown, install of upgrade parts. Our goal is to improve TPU scalability and production quality. As a side note, we received a refurbished Max Neo and will cover the PETG settings and troubleshooting process in our next article.

First, we have already discussed the reasons for upgrading the parts and quality benefits it brings. We have purchased the necessary parts for the updates to increase our success rates. Now, let’s move on to the physical upgrade.

Unbox Upgrades

Let’s get started, shall we? We have  got our boxes and can officially begin the TPU Upgrade process. Continuing, all parts have been unboxed, including the new extruder with direct drive that features an easy-to-install quick connect with locks on the print head. Additionally, we have the rail cart for bolting the extruder to the rail and powering it with the axis motors. Next, we have the new silent motherboard, which is necessary for installing the Creality Sprite Extruder Pro kit. Secondly, we have the new bed plate ready to go. Once the process is complete, we will test the machine first without the upgrade and then with it to ensure everything is printing smoothly.

Unbox Parts, Printer Teardown and  Disassembly References
Motherboard

Motherboard

WiFi Box 2.0

WiFi Box 2

Sprite Extruder Pro Kit

Sprite Extruder Pro Kit

Sprite Assembly Pro Unboxing

Extruder Pro

Power Down

Power Down

Unplug

Unplug

Prep Screen & Unplug

Prep Screen

Disconnect Motors

Disconnect Motors

Starting the TPU upgrade process? Let’s begin by removing all power cords. If you have a Wifi 2.0 Box or Sonic Pad, those should also be powered down and their cords removed. I prefer to start fresh with no cords. Now, we have our tech tools. I  will post a link to the shopping list following this post. If you have the original set of tools provided by Creality at purchase, those will work just fine.

Begin Teardown, Be Careful and Take Your Time

Let’s dismantle the printer by taking apart the extruder and the extruder rail cart. After removing a few bolts, we should have the printing area cleared. It’s worth noting here, this printer has had mods previously making the direct drive easily accessible.  For more information on the original direct drive build you can refer to the Ender Teardown and Rebuild – 5 Part Series. In the series, you will see the filament clean up, power cables treatment, e-touch and cable connections from the extruder to the board. Additionally, bolt removal, cart removal, and extruder change. The printing area should now be free of extruder parts and the rail cart

Let’s Keep Going

Look around the 3D printer frame, specifically the drivers, those should be unclipped as well. I also like to disconnect the screen here. There is a clip on the back: the ribbon connector can be unclipped and set aside. Now, gently lift and turn the machine clockwise, placing the machine on its right side or screen side (which has been removed for this exact reason).

The top screw does not need to be removed here; it is one of 4 or 5 screws that hold the motherboard to the base Start by unscrewing the right-hand side first (motherboard side), being careful to unplug the 0.10 A computer fan clip, and then move on to the left side (power side).

Next, Ribbons, cords, and wires of various shades and colors may have shifted around a bit, especially in this case, as the printer was previously upgraded. Therefore, electrical wires or shield tape may be wound tightly. Be gentle with the cover screws, as they will be used again in approximately 15 – 30 minutes.

Quick Recap

Take a look around, assume if you have tilted the machine clockwise on it’s side by roughly 90 degrees and removed the screws. On the left, we are examining power management, and on the right, control.

Equally important, a visual inspection will reveal hot glue on all or most of the motherboard connectors, depending on the condition of the machine.

If the machine is new or refurbished, hot glue is common, so don’t be alarmed!

This is to be expected for Creality machines. We will begin removing the glue using a spudger, hemostats and/or gloved hand. In this process, we start from right to left, starting with the screen connector (rainbow ribbon), the top connector marked GV IN G OUT, the mini two-wire connectors (grey and the black axis wires), the fan wires (yellow and blue), and the red, yellow and black harness. Ignore the power wires for now, we will be address those in the third step. Next, we will move to the top of the board to disconnect the X, Y, Z and E black wire harnesses. You’re almost there, you can do this!

Disassemble Extruder and Motherboard
Internal Fan

Internal Fan

Unscrew Power Cover

Unscrew Power Cover

Power Unit

Power Unit

Unscrew Housing

Unscrew Housing

Motherboard

Motherboard

Hot Glue Removal

Hot Glue Removal

Right-to-left

Start Right-to-left

Disconnect Cables

Disconnect Cables

Fans & Power

Fans & Power

Disconnect Power

Disconnect Power

All Connections

All Connections

Remove Board

Remove Board

Let’s move on to the green locks next. Using a flat head screwdriver, start from right to left to unscrew and remove the red and black wires. Voila! We are now 50% complete. The glue removal process usually takes the longest, making it challenging to navigate the board space. Let’s unscrew the board from the frame (unscrew the two bolts on the front), leaving the last screw on the top, removing the top from the frame. Unscrew the motherboard and set it aside for safekeeping or for use in another refurbished printer in the future. Take a moment to check around the frame, organize the screws and bolts (I recommend using a piece of paper and a Sharpie). Draw a box label it,  and tape the hardware screws securely. 

Motherboard and Extruder Installation

Straightaway, let’s start by removing the new motherboard from its package, if you have not already done so, and placing it into the motherboard (control) space. Additionally,  make sure to safely connect the USB and MicroSD connectors on the board first, then align the board with the appropriate screw mounts on the board. Once the screws are in place, the board should sit firmly in place, secured and ready to go!

Reassemble 3D Printer, Upgrade Reference
Attach New Board

Attach New Board

Left-to-right

Left-to-right

Positive And Negative

+ and –

Fans and Motors

Fans and Motors

Upper Cables

Upper Cables

Seat Cables

Seat Cables

Okay, in reverse, the TPU Upgrade process continues with the new Sprite Extruder raw wire ends. Start by securing the green motherboard locks first, moving from left to right. The power from the power unit should be on the side of the board, with alternative red/back wires. Make sure to read the labels to ensure the correct landing spot for those power wires. Next, connect the yellow/blue fan and the red, yellow, and black wires just below the fan connector. Moving right replace the x-, y- , z-, TB, TH, and GV IN G OUT connections. Now, connect the screen ribbon. Double-check all fittings and  secure the green locks on the board to ensure a snug fit.

Finally, when working on the motherboard, let’s replace the screws on the power unit side carefully. Run the wires through the notched metal railing and secure the front bolts for the control cover, bottom screws, and the top screws. This is a critical area where you must exercise caution, as the cables can easily break. Take your time here.

Post Installation Checks, Screws, Belts and More

Continuing on, secure the Pro Extruder Kit. Lift, turn, and place the printer  in its center. All wires, ribbons and connectors are ready for the new drive. Next, install the extruder and fit it to the assembly cart. Thirdly, connect the e-touch ribbon cable, seat the cable so that is snug. Fourthly, seat the red hot wire creating a connection between the hot end and the extruder. It may have a tight fit, so now is the time to place the wire while the extruder is loose on the cart. Secure the extruder to the cart mounting point by placing the screws and tightening them down. Moreover, ensure a secure and tight connection, firmly setting the drive in place!

Next, if you machine has an E-touch, screw it to the provided mounting hardware. Ensure a good fit by checking the orientation and making sure the extruder card fits snug on the rail. Securely attach the axis cables or rubber power drive belts. The belts slides into place on the backside of the assembly cart). This should be loose from the  if dismantling process. Firmly, attach axis cables, or rubber power drive belts. Undoubtedly, the belts slide into place (two slots cut out on the assembly cart) on the backside, if you remember during the teardown process. Next, loosen the X/Y axis drive belts using the red knobs, one on the front and the other on the right side. Now, tighten those knobs by turning them clockwise to apply tension to the belts and cart.

Extruder, Power On and Level
Seat Extruder

Seat Extruder

Power On

Power On

Hone & Level

Level

Replace drive connectors, which are key for stable linear and vertical movement. Reference tags will indicate connectors for controlling the x and y drive motors. Install the extruder ribbon by tucking it behind the two black plastic static tabs located just above the connector saddle and ribbon locks. 

Now the real test begins… the TPU Upgrade process continues to the next round! The series progresses, read more about TPU Post Processing or go back to the beginning with TPU Action. Finally, we will cover the initial settings, slicer, accessories and final settings in the next installment, so stick around. If you’re new to the series you can revisit upgrade parts on our affiliate shopping area and review pricing, upgraded hardware reviews, accessories and filament essential for this build. Alternatively, you can skip ahead, review article upgrade parts and accessories in the series opening.
Space Pens

Purchase A Fisher Space Pen

Fisher Space Pen

Fisher® Space Pens

Gear – Fisher Space Pen

Need a pen? Does anyone have a pen? Please, can I borrow a pen? A Fisher SPACE PEN? What’s going on? Is this some kind of alien artifact?

Yes, indeed it is a Fisher Space Pen. You can get yours here, just click the Fisher hyperlink and you’re all set! Moving on, this may increase my bounce rates, but who’s keeping track at the point? Let’s take a closer look, first, let’s purchase one! There are many ways to buy these pens, but the manufacturer’s website works best for me. We purchased ours at the Kennedy Space Center Visitor Complex. Easy-peasy. One thing to note, Fisher also makes great pens with emblems, NASA Anniversary or Commemorative Pens and more. We choose the basic one, for a full list, check out or shop the (https://thespaceshop.com/fisher-spacepen/) NASA Fisher collection. Heck, I should’ve shared photos of the pen, so the Fisher collection shopping experience will have to suffice for now.

Fisher Bullet Pen

It’s rather small, about half the size of a normal pen, textured, black. You can  open the pen by sliding the front cap off the back half and replacing the cap on the back end. This will create a full sized writing instrument.

I use these pens for all my ‘writing/drawing’ needs including writing, drawing, shading, point/pointillism, sketch lines, home improvement (tasks, opening boxes, and random drone part bags). open boxes, random drone part bags).  These writing instruments were designed to be used in outer space! Need I say more? Check out images on spacepen.com.

Have a need? Look over our other pens, art supplies and more in this two part series – Part 1 -Drawing Tools and Part 2 – Drawing Tools