M1 Refurb

Let’s Refresh This Apple M1 MBP

M1 Screen and Keys

Refurb Update – Keys, Touchbar and Screen – Images being prepped

M1 Mid 2020 Refurb process – Keys, Touchbar and Screen

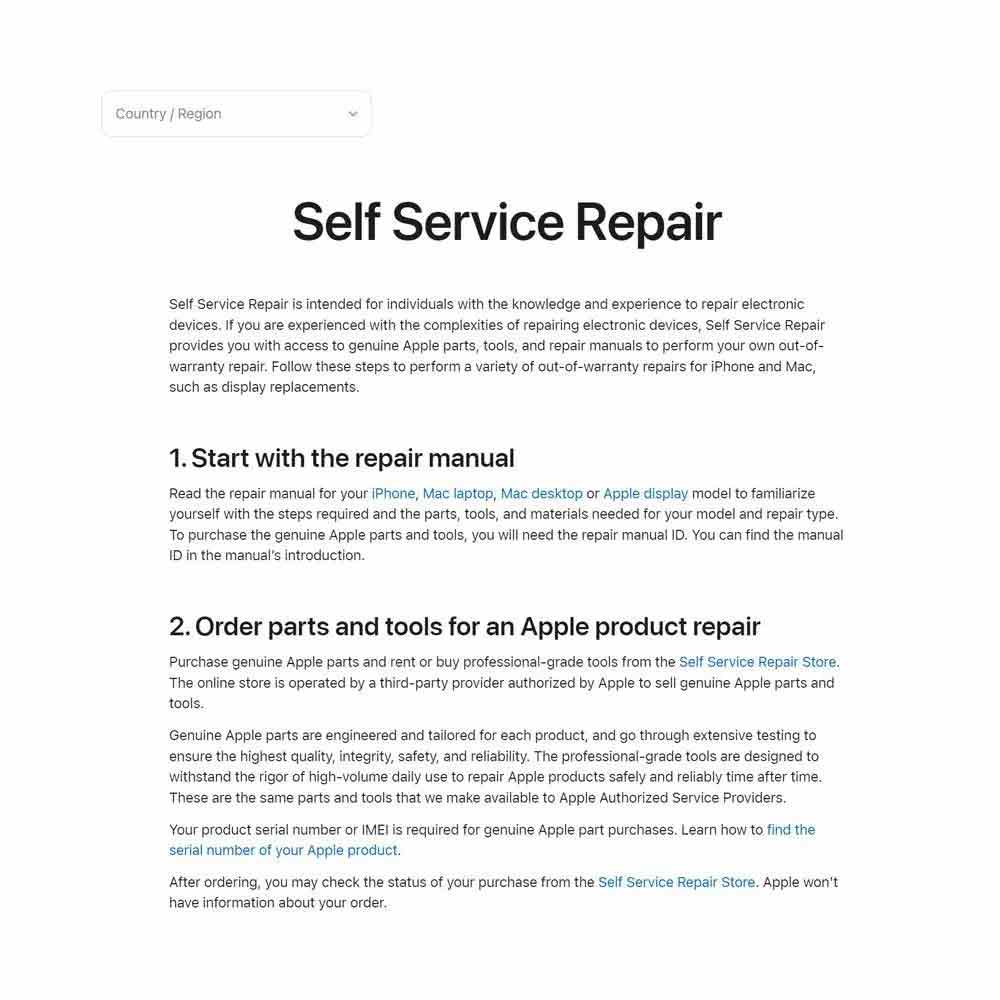
Not recommended, but if you’re in a pinch, there is a way to continue with the M1 Refurb without purchasing a new M1 upper and/or M1 full assembly. A reminder, I should mention the Apple Self Repair help and  Parts/Catalog. All links are handy to have in a pinch.

Blocker and Resolution

An all in one post was supposed to be the next article in this series.  However, it will be split into two separated articles as continuation of the M1 Refurb process. One will focus on the screen and keys, while the other will cover the touch bar repair. Since the touch bar repair is quite invasive, it makes more sense to  address the screen and keys separately and then tackle the touch bar in another post. The will result in a lengthy post, as you can imagine.

Where are the future posts, today? Funny you asked, as I’ve got most, if not all 25 plus images ‘in-process’ – size, color, lighting etc. For all intents and purposes, the story line is complete. The pre-post work is also complete at this point. I think there were around 50 steps to remove, replace, and install the touch bar, so we will make it as streamlined as we can. More to come, check back in a few days, as we should have the post ready to go.

Jump Ahead

Okay, let’s fast forward, now that the series has come to it’s conclusion. With that we got that out of the way, you can continue the journey from start to finish here with some helpful links: 1. Self Repair, 2. Visual Inspection & Teardown, 3. Screen & Keys and 4. Touchbar.

M1 Self Service Repair

Repair, and Fix Tech For Yourselves

Apple Self Services Help

M1 Self Service Repair – Apple Documentation

M1 Repair – Self Repair Documentation, Websites etc

Those of you who are not certified, no worries.  We use the links below to fix various Apple products, iPhones, iPads, MBP’s (Macbook Pro’s) and this M1 Self Service Repair as noted.

No longer certified? It’s a breeze!  Never certified, there are challenges, but this article will help. Two very important links, Self Service Repair – https://support.apple.com/self-service-repair and Parts. So, this article will focus more on the later, when your warranty has expired. Remember, there are options, tried and true, Apple’s Self Service Repair options.

Apple Self Service Repair Options

First, keep in mind, there are always options. We’ve got warranty, approved services providers, and self repair options. Second hand as well, don’t forgot others have gone through similar experiences; a loss of a drive, broken/cracked screen and worse, failed motherboard.

Bare in mind there are options available, specific for the M1 build, or article title, M1 Self Service Repair, even when Apple Care+ warranty has expired. Learn to fix Apple tech yourself. Be sure to do your research,  of course. Perhaps, you might want to start here… I’ll let Apple explain the ‘other repair options’ independent repair providers and self service repair. Avenues become limited as the warranty expires or those who can perform the fix on the go.

Next, let’s assume our options are limited for the M1 MBP… the Apple Self Service Repair (resource website) will help with your repair; this assumes you know what you’re doing. Parts can be purchased as well, … also, there is chat support available, where it makes sense. Do your due diligence. Can’t stress this enough, especially those who are just getting into electronics as a hobby, or starting those who can fix friends and family electronics.

Series Continues

Lastly, good luck with your own Self Service Repair, same for the Parts catalog.  The build continues on the M1, check out the subsequent articles (5 in total) M1 Refurb, Visual Inspection and TeardownM1 Touch bar, and Screen & Keys. Enjoy! Friendly reminder,  It’s vital to use OEM parts IMO (in my opinion), if you can, second hand via Amazon or eBay. Moreover, the parts list is very helpful for those familiar with the process. If not, don’t be afraid to reach out if you’re in a pinch. Happy to help or help guide you to the right support method/service.

TPU Upgrade Process

Install New Direct Drive, Build Plate Upgrades

Completed Build

TPU Action – Upgrade Process

Max Neo Upgrades: The Upgrade Process, Part of the TPU Action Series

Now, let’s discuss the Creality Max Neo 3D Printer Upgrade – unboxing, teardown, install of upgrade parts. Our goal is to improve TPU scalability and production quality. As a side note, we received a refurbished Max Neo and will cover the PETG settings and troubleshooting process in our next article.

First, we have already discussed the reasons for upgrading the parts and quality benefits it brings. We have purchased the necessary parts for the updates to increase our success rates. Now, let’s move on to the physical upgrade.

Unbox Upgrades

Let’s get started, shall we? We have  got our boxes and can officially begin the TPU Upgrade process. Continuing, all parts have been unboxed, including the new extruder with direct drive that features an easy-to-install quick connect with locks on the print head. Additionally, we have the rail cart for bolting the extruder to the rail and powering it with the axis motors. Next, we have the new silent motherboard, which is necessary for installing the Creality Sprite Extruder Pro kit. Secondly, we have the new bed plate ready to go. Once the process is complete, we will test the machine first without the upgrade and then with it to ensure everything is printing smoothly.

Unbox Parts, Printer Teardown and  Disassembly References
Motherboard

Motherboard

WiFi Box 2.0

WiFi Box 2

Sprite Extruder Pro Kit

Sprite Extruder Pro Kit

Sprite Assembly Pro Unboxing

Extruder Pro

Power Down

Power Down

Unplug

Unplug

Prep Screen & Unplug

Prep Screen

Disconnect Motors

Disconnect Motors

Starting the TPU upgrade process? Let’s begin by removing all power cords. If you have a Wifi 2.0 Box or Sonic Pad, those should also be powered down and their cords removed. I prefer to start fresh with no cords. Now, we have our tech tools. I  will post a link to the shopping list following this post. If you have the original set of tools provided by Creality at purchase, those will work just fine.

Begin Teardown, Be Careful and Take Your Time

Let’s dismantle the printer by taking apart the extruder and the extruder rail cart. After removing a few bolts, we should have the printing area cleared. It’s worth noting here, this printer has had mods previously making the direct drive easily accessible.  For more information on the original direct drive build you can refer to the Ender Teardown and Rebuild – 5 Part Series. In the series, you will see the filament clean up, power cables treatment, e-touch and cable connections from the extruder to the board. Additionally, bolt removal, cart removal, and extruder change. The printing area should now be free of extruder parts and the rail cart

Let’s Keep Going

Look around the 3D printer frame, specifically the drivers, those should be unclipped as well. I also like to disconnect the screen here. There is a clip on the back: the ribbon connector can be unclipped and set aside. Now, gently lift and turn the machine clockwise, placing the machine on its right side or screen side (which has been removed for this exact reason).

The top screw does not need to be removed here; it is one of 4 or 5 screws that hold the motherboard to the base Start by unscrewing the right-hand side first (motherboard side), being careful to unplug the 0.10 A computer fan clip, and then move on to the left side (power side).

Next, Ribbons, cords, and wires of various shades and colors may have shifted around a bit, especially in this case, as the printer was previously upgraded. Therefore, electrical wires or shield tape may be wound tightly. Be gentle with the cover screws, as they will be used again in approximately 15 – 30 minutes.

Quick Recap

Take a look around, assume if you have tilted the machine clockwise on it’s side by roughly 90 degrees and removed the screws. On the left, we are examining power management, and on the right, control.

Equally important, a visual inspection will reveal hot glue on all or most of the motherboard connectors, depending on the condition of the machine.

If the machine is new or refurbished, hot glue is common, so don’t be alarmed!

This is to be expected for Creality machines. We will begin removing the glue using a spudger, hemostats and/or gloved hand. In this process, we start from right to left, starting with the screen connector (rainbow ribbon), the top connector marked GV IN G OUT, the mini two-wire connectors (grey and the black axis wires), the fan wires (yellow and blue), and the red, yellow and black harness. Ignore the power wires for now, we will be address those in the third step. Next, we will move to the top of the board to disconnect the X, Y, Z and E black wire harnesses. You’re almost there, you can do this!

Disassemble Extruder and Motherboard
Internal Fan

Internal Fan

Unscrew Power Cover

Unscrew Power Cover

Power Unit

Power Unit

Unscrew Housing

Unscrew Housing

Motherboard

Motherboard

Hot Glue Removal

Hot Glue Removal

Right-to-left

Start Right-to-left

Disconnect Cables

Disconnect Cables

Fans & Power

Fans & Power

Disconnect Power

Disconnect Power

All Connections

All Connections

Remove Board

Remove Board

Let’s move on to the green locks next. Using a flat head screwdriver, start from right to left to unscrew and remove the red and black wires. Voila! We are now 50% complete. The glue removal process usually takes the longest, making it challenging to navigate the board space. Let’s unscrew the board from the frame (unscrew the two bolts on the front), leaving the last screw on the top, removing the top from the frame. Unscrew the motherboard and set it aside for safekeeping or for use in another refurbished printer in the future. Take a moment to check around the frame, organize the screws and bolts (I recommend using a piece of paper and a Sharpie). Draw a box label it,  and tape the hardware screws securely. 

Motherboard and Extruder Installation

Straightaway, let’s start by removing the new motherboard from its package, if you have not already done so, and placing it into the motherboard (control) space. Additionally,  make sure to safely connect the USB and MicroSD connectors on the board first, then align the board with the appropriate screw mounts on the board. Once the screws are in place, the board should sit firmly in place, secured and ready to go!

Reassemble 3D Printer, Upgrade Reference
Attach New Board

Attach New Board

Left-to-right

Left-to-right

Positive And Negative

+ and –

Fans and Motors

Fans and Motors

Upper Cables

Upper Cables

Seat Cables

Seat Cables

Okay, in reverse, the TPU Upgrade process continues with the new Sprite Extruder raw wire ends. Start by securing the green motherboard locks first, moving from left to right. The power from the power unit should be on the side of the board, with alternative red/back wires. Make sure to read the labels to ensure the correct landing spot for those power wires. Next, connect the yellow/blue fan and the red, yellow, and black wires just below the fan connector. Moving right replace the x-, y- , z-, TB, TH, and GV IN G OUT connections. Now, connect the screen ribbon. Double-check all fittings and  secure the green locks on the board to ensure a snug fit.

Finally, when working on the motherboard, let’s replace the screws on the power unit side carefully. Run the wires through the notched metal railing and secure the front bolts for the control cover, bottom screws, and the top screws. This is a critical area where you must exercise caution, as the cables can easily break. Take your time here.

Post Installation Checks, Screws, Belts and More

Continuing on, secure the Pro Extruder Kit. Lift, turn, and place the printer  in its center. All wires, ribbons and connectors are ready for the new drive. Next, install the extruder and fit it to the assembly cart. Thirdly, connect the e-touch ribbon cable, seat the cable so that is snug. Fourthly, seat the red hot wire creating a connection between the hot end and the extruder. It may have a tight fit, so now is the time to place the wire while the extruder is loose on the cart. Secure the extruder to the cart mounting point by placing the screws and tightening them down. Moreover, ensure a secure and tight connection, firmly setting the drive in place!

Next, if you machine has an E-touch, screw it to the provided mounting hardware. Ensure a good fit by checking the orientation and making sure the extruder card fits snug on the rail. Securely attach the axis cables or rubber power drive belts. The belts slides into place on the backside of the assembly cart). This should be loose from the  if dismantling process. Firmly, attach axis cables, or rubber power drive belts. Undoubtedly, the belts slide into place (two slots cut out on the assembly cart) on the backside, if you remember during the teardown process. Next, loosen the X/Y axis drive belts using the red knobs, one on the front and the other on the right side. Now, tighten those knobs by turning them clockwise to apply tension to the belts and cart.

Extruder, Power On and Level
Seat Extruder

Seat Extruder

Power On

Power On

Hone & Level

Level

Replace drive connectors, which are key for stable linear and vertical movement. Reference tags will indicate connectors for controlling the x and y drive motors. Install the extruder ribbon by tucking it behind the two black plastic static tabs located just above the connector saddle and ribbon locks. 

Now the real test begins… the TPU Upgrade process continues to the next round! The series progresses, read more about TPU Post Processing or go back to the beginning with TPU Action. Finally, we will cover the initial settings, slicer, accessories and final settings in the next installment, so stick around. If you’re new to the series you can revisit upgrade parts on our affiliate shopping area and review pricing, upgraded hardware reviews, accessories and filament essential for this build. Alternatively, you can skip ahead, review article upgrade parts and accessories in the series opening.
Gadget Backlog Update

Let’s Look At the Gadget List

Last Best Tool - Klein Tool Driver Set

Klein Screwdriver Set, SHURE MV7 Podcasting Kit, and Aupus Air Duster

Gear – Backlog

Quick update on the Gadget Backlog, SHURE MV7 Microphone Podcast Kit, Air Tools – Inflators, Nailers Gauges and Compressors (out soon), Air Duster (A.K.A Air “Cannon”) and Klein Tools Precision Screwdriver Set.

Both positive and negatives, the Klein set is a big win, those of you needing a sleek, high-quality, tech/electronics platform; Klein is the way to go. Same for the Aupus Air Duster… a handy, handheld, to blast away dust and debris… And the SHURE MV7, same on quality, and crisp sound quality, the best with SHURE.

Let’s start with the ‘good’ vs the ‘bad’ or ‘ugly’ movie reference “The Good, The Bad, The Ugly – Clint Eastwood”. Let’s cover the precision screwdriver set and air duster.

Klein Tools Precision Screwdriver Set

First, the Klein All-In-One Precision Screwdriver Set. If you’re working with smaller appliances – coffee/espresso machines, vacuums, toys, gaming equipment, computers, phones or tablets (Apple specifically). You’re gonna need an elevated, array of tech gear and tools such as – glues, adhesives, adhesive ‘strippers’, grounding elements or bands, gloves, fans, shims or prying tools, same for hex/Torx bit heads… Just to name a few.

In many cases, if one was to change out a generic computer battery (Apple MBP) you might need – micro Phillips-head/Torx, pry tool, shims, glue stripper, gloves, heating elements, grounding band, adhesives and then the micro Philips-head and Torx to secure the updated battery array and shell Hopefully you can understand here, the Klein All-In-One covers the range of electronic screws and bolts used in the latest gear.

Just want to spend a few mins on the screwdriver set which comes in a sturdy, rugged, hard plastic box (tough box)… with what Klein calls a stay-shut latching mechanism, again, handy to have when your carrying mini-bits/drivers around. The case is great for indoor/outdoor, ‘shop-like conditions’ which may not be pristine per say. Contained within the tough outer shell, a magnetic hand screwdriver base or platform for ‘finger tightening/loosing’, a preformed bit section for 39 extra-long driver set which includes – flatheads, hex, Torx, square, star and Phillips-head bits.

Those of you needing Apple specific driver bits, check out this set and pick yourself up a set(not a paid advertisement). High quality stuff, easy to use and magnetic. Always nice and handy to have magnetic tools for very small applications, those of you who require small tools for small screws, clips and bolts. Great set for those who need one, pick one up a Klein Tools.

Aupus Air Cannon

Moving along now, staying with the ‘Good’. No cans, no more air canisters, missing straws, cold hands and/or the storage space for air cans. Nope, the Aupus Air Duster is a win for two reasons, space and strength. No need to save space for 5 or more cans of compressed air. We are talking desktop or storage space for those of you working in tight office spaces; the DIY(do-it-yourself).

The Aupus purchased has two settings of air pressure or strength, both will help push dust and debris out and away from it’s intended target. Sound is constant, no shuddering or sputtering, no power loss or surging. The air duster is made of rigid plastics, great for many applications around the shop – featuring a friendly grip, multi-speed selector, filtered intake and a set of cleaning tools – brushes, extension tube, additional filters and fine funnels for more precise air distribution. No batteries, just an old-fashioned plug and play, so, plenty of power where and when you need it when comparing the Aupus Air Duster to a generic can of air.

The SHURE Podcast Kit

Let’s transition to the ‘bad’ or mixed review now. The ‘bad’, might be a little harsh.. When sticking to the theme of “The Good, The Bad and The Ugly” perhaps the final product covers the bad and ugly. For the sake of the argument, let’s just use a ‘soft pass’ on the Shure MV7. Specifically due to it’s reliance on additional software. That’s the rub for this article. Which is where we feel it fails to meet expectations, so, a mixed review of sorts.

The positives, sure SHURE (SHURE MV7 – Podcast Kit) makes a great product, excellent sound quality, nicely packaged for various applications – live-streaming, home recording, podcasting and more. Hardware is what you would expect from the legendary Chicago, IL – Sidney SHURE founded audio/electronics and hardware manufacturer, for nearly 100+ years, producing some of the highest quality audio (electronic gear/hardware)… it’s tough to give this one a mixed review.

MOTIV Required

Honestly, I think this is why we might merge the ‘ugly’ with the ‘bad’. What ‘smokes out the deal’ for us, is the reliance on a secondary application called MOTIV. I get it, the software a need, a must. How else would you use the microphone? The software helps the user fine tune the collection of sound, amplification, distance of sound travel, and hardware recognition. Again, the rub, it’s yet another app/window chewing up space, floating desktop application cluttering up an already densely populated screen – browsers, live-streaming apps, video software, editing software and so on.

You get the picture, an ugly one. Although, you may not agree, but this is where the experience falls short for me. If there ever was a time where  hardware shouldn’t require os manipulation or software. This is the time, we would have a winner. Again, great kit, includes all the connections one would expect these days, USB-C, XLR, a desktop mount for local sound collection, and crisp sound recording.

The product was built and sold as a podcasting kit, targeting those v-loggers podcasters and content creators. Or, the inter-webs adventurers, the law tubers, the gamers, the influencer type  and/or home/office applications. All is well, until you understand, an application is required to download and run the physical hardware. The MOTIV app can be downloaded from the site, found on either App Store or Google Play Store. Caveat, multiple OS platforms, MacOS, Windows and Ubuntu. Honestly, this is not the solution for me. I was open to new gear and not said proprietary software running to manage external hardware.

Takeaway

Final thoughts, takeaway, give it a shot, the microphone is fantastic, sound quality is top notch. A home-run, if I might use a sports analogy as well.  If you’re looking for a reliable microphone, precision sound quality (bar-none), this might just be your winning ticket. For us, however, we will pass for now.

More on the next one, cheers

TPU Update

TPU Components, Direct Drive and More

Creality Extruder, Full Assembly

New Assembly and Drive Drive Extruder

Lab Work – Bolt On Upgrades

We are updating the extruder – TPU Update. Adding a bolt-on direct drive upgrade and replacing the Series 3 full assembly body.

The TPU update is a go. First, PLA is great. TPU is better for certain applications. However, we start with PLA. If you need flexibility over rigidity it is assumed that you want to test TPU filament. First, we will replace the existing assembly body on the MAX NEO and bolt on the new extruder to address the TPU issues*. TPU requires more force to drive the flexible filament through the assembly and out the nozzle. The direct drive will help with ‘refinement’ and focusing on pushing and pulling the filament more accurately and precisely.

Creality Accessories
Unboxing

Unboxing

Drive Motor

Drive Motor

Assembly

Assembly

Remove Extruder

Remove Extruder

Unscrew The Fans

Unscrew the Fans

Assembly

Assembly

Again, in terms of next steps and the TPU Update, the update is not a *requirement,. However, after seeing enough test prints, it’s time to make the switch. Here is the bolt on solution from Creality for the Ender 3-Series, MAX NEO. Moreover, what do I mean by ‘requirement’ above? In my opinion, it would be extremely difficult to print TPU printables using a Bowden drive. I’ve tried, and it doesn’t work well. Finally, the Bowden drive doesn’t provide enough filament force and direct force to the filament through the hot end, hence the need for a direct drive motor. So, I want to emphasize that there’s no need to buy a new machine for TPU printing. Simply, do the swap and you can print both TPU and other high-temperature filaments as well.

Quick update: since this post was shared, we have received the parts for the TPU updates, allows us to begin the direct drive build. TPU filaments and prints can now be done without the necessary upgrades. Let’s get into the build and upgrade action! Side note, before we move off the direct drive action, I’d like to share other Halot updates including the Halot LCD fix and other break-fixes when adding a resin printer to your arsenal.

Stay tuned for additional photos and mini-clips covering the installation soon. In the meantime, here is a brief unboxing and assembly tear-down. Thanks!

Galaxy Series Reset

Samsung Galaxy S21 5G Reset

Samsung Galaxy Reboot, Reset, and Unplug

Galaxy Reset or New – Privacy, Backups, Access and More

Tech And Tools – Samsung Updates

Before we delve into our dual-SIM experiments, let’s address the Galaxy Series Reset. I wanted to share some Samsung Tips and Tricks that could help you remove unnecessary apps from your Galaxy series devices.

Let’s take a quick look at the world of ‘debloating’. We’ve seen an abundance of pre-installed native apps on various platforms, OS, iOS etc. It feels like were back in the 90’s with PC sales. This trend applies to both Android and iOS devices. Until we have a user-friendly Linux based mobile OS or an open-source mobile kernel that allows us to customize our devices based on our needs, we’re stuck with what we have. 

Mobile phones come loaded with Google bloatware and the same goes for iOS. When did Homekit, Health, Health Sensors and Siri start coming preinstalled and running constantly, making it difficult to disable them? It’s a challenge that won’t disappear with this Galaxy Series Reset. However, a I’ve been exploring new settings, OS-specific adjustments, and techniques to reduce bloat, limit Google access. Whether you have a new generation Samsung smartphone, Galaxy S22, 215g or 10, or a later model, we have some fresh methods to help you regain control of your device.

Diving right into it, whether you’ve got a new phone or not, a hard reset is required… Backup what you need and store it in a safe place. Most of the time it’s automatically saved somewhere, but we plan to take back that control and manually take steps to move the process forward. The time to de-bloat or de-bloat your device is right now.

Short Tutorial

Fresh Hard Reset on your existing phone or set up your new phone from scratch to begin the Galaxy Series reset. First, do not add or allow any Samsung, Google, or non-platform services that you do not want running regardless of their power status. A prominent red warning sign advises against signing in or allowing data transfer to any external services that are not native to the system or necessary. 

NEXT, let’s disable all permissions for apps, stop and remove permissions and alerts for any unwanted apps. This is crucial as we do not endorse the input/output of such apps. Particularly those that are third-party, external, and considered bloat that may track and access your data without your permission. Turn off all unnecessary apps or system apps. Additionally, rearrange your apps as you see fit, grouping Samsung native apps that are essential together in a separate folder with other Samsung or Google apps. Do NOT enable cloud services, sign in, or log into any systems that you may want to use later on, at least not yet.turn on cloud services, sign in or log in to those (any) systems you will want later.. so not just yet.

Wrap Up – Debloat Your Android Device

Finally, it’s time to reintroduce existing settings. We want to re-import contacts and any bookmarks or Same for any bookmarks or saved ‘behavioral’ help settings. Must Have’s  must go for the Google/Samsung requests to access the phone. These actions remain out of touch and are not allowed. Let’s clean up the home screen to your liking and add email accounts as well.  Browser settings when your ready, no go on Chrome, Google or Samsung Internet, we use brave with all turned off…

DON’T FORGET THIS, don’t forget to make sure privacy settings meet your needs. As usual, leave a comment below and let us know what you’re thinking?

Samsung Next Generation

S20 5g, Next Generation Samsung Galaxy Devices

Samsung S20

Samsung Next Generation – Samsung Galaxy S205G

Gear – Samsung Next Generation, the Samsung Galaxy S20 Series

Time to switch? Looking for Samsungs next generation phones? iPhone-to-Galaxy? Or LinuxOS? We think so. We test and make our decision., then we share why we made the decision we did. The decision is in. S205G over iPhone11/, Phone12, S21, or S22 the latest models. We are not talking about the latest Galaxy Series or the Z-Fold, or the iPhone 13.

It’s has taken many months, even years of practice to make the change. I encourage you to consider making a similar decision to switch. Practice makes perfect. Let’s stick with practice, practice and more practice! Nothing compares to MacOS and iOS. Yes, everything MacOS, iOS. So, what comes with the decision? UI familiarity, yes. Did I mention all the machines we use on a day-to-day basis are MacOS? Certified to service these machines? Most certainly. Comfortable fixing what we’ve always done. Safety, security, battery life, ease of use, and more. All true, including the use of iPhone and iOS products and services since 2006.

Blackberry Experience and Switch

Practice makes perfect. That’s a lot of practice in my opinion. Historically speaking, and assuming my memory is correct, we made the initial jump from Blackberry and Blackberry products specifically the Blackberry 8100 (’06) series and the 8300 (’07) series, to the iPhone. And the main reason for this switch? Touchscreen keys. At the time, the main issue was the incompatibility or lack of practice with onscreen-typing or touchscreen services couldn’t get on board with the Blackberry touch model (whatever it was called). Let me share a quick story…

Many years ago, I remember sitting in a multi-million dollar test lab (usability lab), testing the latest UI designs and services and a user was ‘testing’ via the Blackberry Storm… I’ll spare you the pain, but let’s just say that during that specific test, the Blackberry touch devices were out, and the iPhone was in. Specifically, the iPhone 3G. Early being an early adopter of technology, the Blackberry (the workhorse of many business years) failed the two tests performed in a controlled lab experiment. Fast forward to the present, specifically in relation to iOS/iPhones, it has been many, many years of practice, perhaps too many. I have included a link above comparing the iPhone 13, 11, and iPhone 6s for those who want a quick glimpse into how the iOS device ecosystem has evolved over the years… However, this is where those years of experience have come to an interesting fork in the road.

A Switch to the S20 5G

Sometime in the second or third quarter of 2017, the Samsung Galaxy lineup started to make sense. I road-tested the S9, S10 and quickly moved on to the 2002 model, the 205G. I carried a work phone with iOS, the Galaxy and a few laptops with various operating systems. Yes, it was a pain, but I’ll spare you the details. After enduring 100% travel, juggling multi-devices and staying in the same hotels, it was time for a change. A few months behind schedule, I finally made the switch to the S20.

Living life on the road, traveling for clients, nearly broke the iPhone spell. I had spent years and years dealing with expensive iPhones, constant turnover, and damage control. As mentioned before, I also spent a significant amount of money and time on testing, studying, and certifying myself in iOS products and service as well as fixing iOS devices. Before moving on, I want to emphasize that we didn’t buy new or directly from Apple, and saving $1,000 made a difference in this experiment.

Buying new may be your preference, but today it wasn’t ours and it won’t be moving forward. In fact, you can find many of our favorite devices second-hand or ‘renewed’ today. So to put it simply, you might be wondering how did we end up purchasing the S205G? ((Panic)) The process was lengthy and challenging. We felt the need to explore all available options. We wanted to make sure we were investing in the right product, choosing the best option for us. What better way to do that by testing everything on the market? We tried almost all of them. From basic, stripped-down Android/iOS and Linux and older phones like the iPhone 6s and 8s, Galaxy S9/S10, S20, vintage Nokia 3300, the LightPhone2, and ultimately settled on the S20 model.

Open Source or Linux Options

Honestly, let’s start with the Linux OS option first. Until we have a Linux – //liliputing.com/ based phone that can cater to the masses, consider Ubuntu Touch, Sailfsh or Pure. In terms of device options, the selection is quite limited – OnePlus, Fairphone, Google Pixel 3 (3a), Pine, and Librem. So, there are limitations.

Another important point is to do your research before making a purchase. Buyer beware, exercise caution, learn how to use command line code, service your own device, install different OS versions. Until Linux devices are suitable as ‘EDC’ (Everyday Carry) and not just for developers, the 20+, Ultra or the S21 series.

In conclusion, the main takeaway is this: we made the switch, but it may not be right or wrong. Choose what make sense for your budget, lifestyle and security needs. This switch was motivated by the desire for control, better battery life, screen, performance, and the dislike for SIRI. Samsung has shown consistent growth, while IOS tends to make frequent changes to buttons, connections, cases, and materials, along with automatic data collection features. This may be a  matter of preference, which applies to all devices. It’s remarkable how iOS has become so prevalent in just over 17 years. Lastly, I must emphasize that this is not a promotion for any specific devices or brand. It’s a reminder to thoroughly test products before making a purchase. I hope this article encourages you to take necessary steps to evaluate what’s available in the market.

GTRacing Update

GTRacing Repair Update

GTRacing Update Frame Fixed

GTRacing Chair Frame Blunder

Gear – GTRacing

So, here is the GTRacing Update. GTRacing Chair Parts Replaced.

It may be premature, but, good on you GT Racing! Dare I say GTRacing made it right? The chair is back together, holding weight as it should. No lean, squeezing, bending-feeling or crash. That’s good, we have a fix. In hindsight, while being desk chair free for a week or more, is not ideal.

The second “chair part”, the one not broken will be relegated to the game and electronics drawer. It goes with the other unused cables, plugs, charges, wires, random batteries etc.

While we have your attention, we will be trying other GTRacing parts, chairs etc,. A full listing will come, however, a sneak peek may serve its weight in gold here… Check out the latest merchandise after the GTRacing Update, and give us a shout if you would like to purchase our gear – new products next quarter.

Side note, with the GTRacing gear, we are looking to sort out some USB devices, stickers and magnets, depending on demand. Let us know what you think about the merch, or if you’re looking for something special, a one off, special order on GTRacing – https://gtracing.com/. If you’re interesting in our new chair, check out our new GTRacing chair sporting new GTRacing ergonomic mesh.

SPOILER – Fast forward, gear adjustment, learn about our new GTRacing Mesh back chair with the lounging feature and footrest posted 6/2024… enjoy!

MBP Mid 2018

MBP Mid 2018 OEM Battery Replacement

Macbook Pro Battery Swap

Apple MacBook Pro Mid’18 Battery

Lab Work – MBP Issues

MBP Mid 2018 Version, Battery and Logic board Issues/Failure – perform a complete teardown, replacement, and reboot to fix there issues.

Background

Our primary machine is the Late MBP 2018 Battery Swap that we use to run the latest applications and code. Recently, it crashed during an upgrade for Mojave/Catalina to BigSur. This ‘upgrade’ coincided with the mid/late summer updates from WWDC. We experienced boot issues, kernel panics, and had to reinstall after reformatting form MAC Journaled to AFPS. We also had to deal with installer packages, boot scripts, and even installed Ubuntu 21, which resulted in a lack of mouse or keyboard functionality.  

Battery Repair
CleanDrive

Clean Drive

Utility Tool

Utility Tool

Reinstall System

Reinstall System

Remove/Update

Remove/Update

Load OS

Load OS

V

VBox

They say pictures are worth a thousands words or more, so let’s take a peek. Oh, and don’t forget ‘csrutil’ enable and disable for unwanted apps, native apps and clearing system integrity ‘issues’. This command only works when you run Recovery Mode, in Terminal Utility… we can just leave that there for another day. One other item to note, this is all MacOS specific. Assuming your running a MacOS alt OS on a Windows (PC), Linux, Linux Alternatives and/or VM, downloads are available and are similar when unpacking the root cause.

Repair Actions
  • Flash Old Version of MacOS and Installer Package
  • Create USB Install via Terminal
  • Etcher
  • Check OS Version (if possible) MacOs Version Compatibility
  • Reset PRAM, Run Diagnostics, Internet Recovery, Target Disk to Move existing files; all there, just make sure you know what version of MacOS. If you don’t, click the ‘Apple’ Icon at the top/left -> Select About This Mac -> Overview. This assumes you have a running version of MacOS. Or check the Apple Product# on the underside of your Macbook Pro and work forward…
  • MacOS Startup KeyBoard Combinations
  • Diagnose Error Codes -1008F, Address Overheating and Fan Control
  • Apple Support thread specific to -1008f
  • Remove Device from iCloud – Find Device, Disable AFPS Admin Security Settings
  • Backup Drive to external storage device
  • Handy Drive SanDisk Drive
  • Clean/Remove Drive, Remove AFPS Drive/Volume(s)
  • Internet Recovery High Sierra, MacOS and Installer Package (Pre El Capitan, Yosemite or Lion)
  • MacOS Mojave
  • MacOS High Sierra
  • Boot MacOS Install, Reinstall Existing Apps, Install Catalina working patches, updates
  • Install New Apps, Settings and Remove unwanted settings as it relates to latest OS
  • Maintain existing MacOS sans MacOS OS Upgrades or Forced Updates, Uncheck installation automation for all apps, requiring system to be manually updated
  • Bootcamp Install, Flash/Install WIN10, Throw-out old server (Z400)
  • Oracle Virtual Box
  • ISOs – MS – WIN10.iso, Ubuntu – Ubuntu 21.10
  • With the addition of MacOS Server
Takeaways

Key takeaways, include make/model, year, shipped quarter, chipset(s) and chip security settings. If your computer is locked, check the iCloud device status, remember install package pre/post logic board changes. We chose this route because all logic boards for this particular machine have been out of stock and remain unavailable for this model. It makes one wonder why. There is no need to replace the battery just yet, but we may have to do so on the second go-around. Don’t forget about our other Apple product posts, for example our review won the Apple Mouse, Apple TV 4K and MagSafe Battery Pack and M1 Visual Inspection & Teardown – which includes key, touch bar and screen repair.

When I have the opportunity, I will post a few pictures of Windows 10 running in Boot Camp, Ubuntu 21 running with keyboard and mouse support, and other images for MacOS Server, etc. As always, feel free to leave a comment below, let us know what you’re thinking!

Late MBP Battery Swap

Inspect And Fix: Late MBP Battery Repair

MBP Battery Swap

MBP 15″ Swap

Lab Work – Late MBP Battery Swap

The teardown and do the Late MBP Battery Swap Repair

Let’s get it! Before we begin, below are photos of the repair process. We are working on a 2013 MacBook Pro “15 Retina laptop with a new battery. Please ensure that you have selected the correct replacement parts, preferably OEM battery parts.

Find The Right OEM Parts, Find Primary and Secondary Parts

First, it is recommended to use OEM Parts, and even a second-hand OEM battery may be a better choice than non-OEM part in this case. OEM parts can be purchased from various websites such as eBay, Apple Parts, Apple Self Service Website, and iFixIt. When performing the repair, it is important to be cautious and take your time. Power and grounding are crucial, so be careful not to energize parts once the case has been unscrewed and removed. Additionally, it is helpful to have a few other items on hand for the repair.

Tools and Repair Kit for the Late MBP Battery Swap

Some other tools to have around the shop might include the Jakemy screwdriver kit, which  contains Torx, hex and star bits. These are key for newer technology bolts and screws used in the assembly process or to hold hardware to the board. Additionally, it’s important to have glue tech adhesives and glue release, gloves, safety glasses, and a welding/soldering mat. These are all useful bare minimum tools to have, including glue release, a tech screwdriver set, and glue adhesive. 

  • Jakemy – Tool Kit 99 Tool Kit
  • IFixit Tool Kit – (ifixit.com/Store/Tools/Repair-Business-Toolkit/IF145-278?o=14)
  • Tech Tool – Cutting Mat
  • Ground Wristband
  • Electronic glue, glue adhesive release
  • Focal Fossa – 20.04 – Ubuntu
  • MacOS Snow Leopard
MBP Swap
Late MBP Swap Prep

MBP Unscrew

MBP Un-glue Battery process

Battery

Late MBP Battery Swap - Un-glue Battery process 2

Remove Glue

Macbook Pro Battery Replacement - Un-glue Battery process clean up

Glue Remover

Late MBP Battery Swap - Macbook Pro Battery Replacement

Remove Battery

Macbook Pro Battery Replacement

Swap, Replace Battery

Late MBP Battery Swap - Macbook Pro

Ubuntu

Apple Certification, Apple MacBook and Robot Repairs

At this point, I’ll assume you are interested in repairs and may want to learn more? Equally as important are the OEM parts as the knowledge to do the repair yourself, intelligibly. Are you searching for parts for your own device? For more detailed information on the Late MBP Battery Swap and the power on and boot process. Check out IOS certification, Apple Certs. Lastly, have a look at this particular MacBook Pro “15 Retina tear-down via IFixit MacBook Pro “15 Retina Late ’13 Tear Down.

In conclusion, more tear-downs and repairs, check out the iPad Mini Fix, Roomba 900 Series Fix or some of our latest MBP Screen & Keys and MBP Touch bar fix. Enjoy! As usual leave a comment below, let us know what you’re thinking?

Lego Base Mod 2

Create A Tablet Base

Lego Base Mod

Workshop Side Projects

Lab Work – Lego Device Housing or Base

Lego® Base Mod update… it’s been awhile since I’ve posted any information or updates on the tablet/device base, so here it is base mod 2.

  • Situation – think fast, tablet housing. Need a handsfree, desktop friendly table housing.
  • Challenge Lego Base Mod 2 – build a tablet housing (landscape orientation only) to house an iPad. Regardless, or irrespective of what model or make, we had an iPad, make something that will work in 5 mins. Go!
  • Accessible materials – Legos®, Toothpicks, Pipe cleaners, various
  • Go!

First, while the Lego Base Mod 2 challenge is primarily for prototyping, try it for yourself. I’ll pull this forward, as I talked about buying bricks 300 pcs set or in bulk (4lbs) if need be. It’s handy to have bricks and Lego parts around the shop, a few bricks, some connectors and you’ve got you very own DIY project build. Moreover, if this isn’t your style, we recommend getting your hands on the Brenthaven.

Secondly, I’m pulling this content forward, second edition accounts for ‘tipping’ and/or stability issue, number of bricks, screen angle and orientation. Issues, devices would tip or fall forward/backward depending on how the user might set the device. Reduced a few bricks, however most were repurposed as support columns or ‘feet’ which helped acute screen angles. Moving forward, mod features portrait and landscape viewing.

Thirdly, caveat, charging cord need was nixed, user will have to set the tablet down when charging or charge in landscape only. There will come a point, at some point, we will include a charging cord mod down the road.

Finally, the previous Side Project Lego Tablet Build article for reference. Or just start here, let’s check out a Lego mobile board housing! Or model train depot!

Galaxy s10+ Damage Video

Galaxy s10+ Damage Video

Nokia 3310

Gear – Galaxy s10+ Damage Video, hot swap for the Nokia 3310

A Galaxy s10+ Damage Video… Time to switch to backup to the backup phone, Nokia 3310, as the Samsung S10+ lost power, its glass is damaged, and more.

Quick Take

The Samsung Galaxy S10+ is now DOA at this point (time of post), damage is  beyond repair (insurance will cover a replacement). So, it’s time for a phone swap, the video is short, showing the S10+ damage, but more importantly, we’ve got a back up phone ready to go. Time to send out the old Samsung S10+ to be replaced and swap in a fan favorite, the Nokia 3310 3g version. Let’s move on, the new version, same old workhorse of a phone. Never would I think of swapping a Nokia for a Samsung… However, no phone, means no business. The S10+ is/was in this case, a great smart device. The only hang up is the Google-fied version of a Samsung Phone. Moreover, I can’t get much out of it if you don’t have a Google account to shop, download and run apps on the phone.

Damage Inspection

The Galaxy s10+ Damage Video doesn’t show the internal damage all that well, more the surface screen and lack of ability to show a picture on the screen. Let’s change that, with a Nokia swap.

Next, these phones are legendary, long battery life – check, cool games – check, texting/sms – check, radio – check. What more could you possibly want out of a smartphone.  Did I mention it can even take a fall from 5ft (assuming normal drop patterns and free fall speeds etc.,)? This Nokia can take a lot of punishment. Batteries are replaceable too! Finally, a moment of nostalgia,  I remember those days, unlimited talk, text, snake… back up battery just in case.

Finally, I wonder why the world moved on from smartphones like the 3310? For phone, a bit of nostalgia, ASCII art can be fun to create on the Nokia 3310.  Well it’s time to get back to work, Nokia swap done and now its time to make some calls.

Post updates, interested in more Samsung related materials, check out Samsung Next Generation phones, like the s215g and reasons to upgrade to the latest and greatest.

Other Lego Side Projects

Lego Projects

Based - Lego Side Projects

Workshop Activities, On The Bench

Lab Work – Lego Projects

Repost – On The Bench with the Lego Tablet Base

Re-posting or the “Other Lego ‘Side’ Projects”, similar to the Gimbal repost (had to repurpose some content, goal was to better utilize material posted in various places around the web). So, I’ll start with the Legos®… Gotta love Lego® Other Lego ‘Side’ Projects.

  • Situation – Think fast tablet housing needed. We need a handsfree, desktop friendly table housing.
  • Challenge – Build a tablet housing (landscape orientation only) to house an iPad. Regardless of what the model or make of the iPad, we had an iPad, make something that will work in 5 minutes.
  • Accessible materials – Legos®, toothpicks, pipe cleaners, various
  • Go!

In short, we were  a quick solution with accessible materials that would allow for various solutions, an iterative build process, and be tabletop/desktop friendly. Another Lego ‘Side’ Projects we worked on was creating a new iPad/iPad case that was purchased separately did not come with a handy, integrated stand. This will a future piece of content. We may consider reviewing a few cases that have integrated stands, such as the Brenthaven.

Moving On

Moving forward, the case we purchased did not have any kind of stand included or attached.  It is a fact that buyers often regret not buying a tablet case with a stand. Before we move to close this article, here are some additional lego specific lab work and videos shared online. Learn about Lego train depot, Lego Tablet base and mini pc board housing.

In conclusion, we had several bins of Legos lying around the workshop and with a little creativity, we were able to create a fully functioning tablet stand/base. This was our first edition, and while there were second and third iterations that were abandoned due to instability and the number of Lego bricks used, the fourth iteration is currently in progress. We plant to reduce the number of bricks used and adjust the screen angle to accommodate various viewers and users. Additionally, the Lego Housing we are featuring needs to allow for both portrait and landscape viewing, as well as integration with charging cords. 

As usual leave a comment below, let us know what you’re thinking?

Supreme Bar Review

Database, Membership and Upgrades

Supreme Bar Review

Personalized Bar Exam Coaching via Supreme Bar Review

Lab Work – Supreme Bar Review

Try Supreme Bar Review, Get Help With The MPRE, Personalized Exam Coaching, Lectures and more.

Explore the premier reference resource in print, online lectures, tutoring options and workshops all within one learning platform. The owner, who is also the owner/operator of a family business, was looking to market the site differently. They wanted to clean up the website and enhance the database.

Further development included operating multiple parent and child sites concurrently driven by WPD, PHP, plugins and eCommerce solutions for online book sales. More details included Web • PHP(Backend) • DB • eCommerce/Shopping Cart. This was a crowning achievement for us at Sallee Technology. Additionally, we focused on building out the reference materials and shop experience, workshops, lectures and videos as mentioned earlier, making it all-encompassing.

It was a pleasure to work with Marc and his creations, glad to have had the chance to work with Mr. Rossen and family. For other law examples or looking for family planning, a local practice and Beachwood attorney, check out Madorsky Law Practice for legal help.

This was a time of great growth, transitioning traditional ‘reference materials’ and book products online while offering more dynamic resource and in-person learning opportunities with more versatile, global, consumable product offering. We aimed to solidify our position as the only source for bar examination preparation, study guides, lessons, and more. 

Before you go, explore other educational services and work associated with The University of Cal. BerkeleyCity YearUniversity School and more. Enjoy!

Madorsky Law Practice

A Cleveland Based, Neighborhood Family Attorney

Beachwood Legal

Beachwood Legal – Larry Madorsky Law Practice

Lab Work – Larry Madorsky Law

Larry I. Madorsky Law Practice (previously Beachwood Legal) 

Thanks to the Madorsky Law Practice (formerly known as Beachwood Legal at the time). A wonderful connection from a close friend of the business stretching back into the mid 2000’s. The client was looking for a ‘new’, practical approach to sharing practice information, preference on communication and testimonials. Client retention and repeat customers were favorable to the practice.

Value in Customer Recommendations and Testimonials

To begin, testimonials (both digital and hand written) were the cornerstone or main feature of the site. Early to adoption of online marketing, coupled with online testimonials and helpful content, helped boost the law practice’s online presence. From the customers perspective, value was in customer feedback in testimonial form. Honestly, and we heard it many times, testimonials having a positive and long-term loyal benefits.  Innumerable amounts of support from our perspective. A keen practice, for those customers who were new and/or in need of legal counsel. A great case of online ‘word of mouth’ economics. The content helped to  explain the services he and his team provided, and the sharing of testimonials helped turn cases and a profit for this practice.

The main goal was to broaden the practice’s online presence with a multi-domain strategy, add testimonials online and create a new marketing/communication channel for his clients. Takeaway, this was a highly successful implementation of the Domain Strategy designed as a ‘hub and spoke’ model – a custom domain strategy and marketing website to address SEO, Learn Analytics, while limiting expenses spent on ads/Adwords. A precursor to social media, using customer outreach to improve customer interaction.

It was a pleasure to work with Larry and his team members, glad to have had the chance to work with Mr. Madorsky and family. For other law examples or looking for MPRE study guides and test prep for the bar, check out Supreme Bar Review for Bar Studies.