Ender 3 TPU Update

TPU Components, Direct Drive and More

Creality Extruder, Full Assembly

New Assembly and Drive Drive Extruder

Lab Work – Bolt On Upgrades

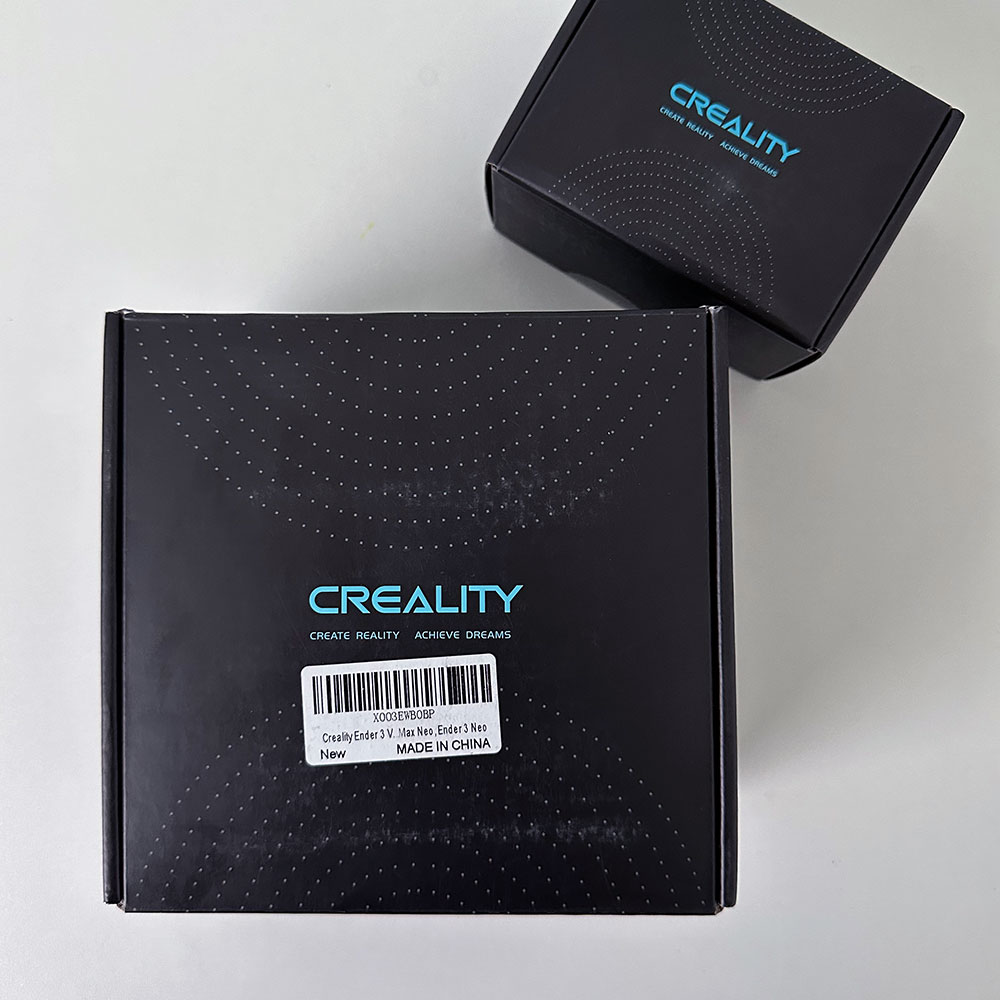
We are updating the extruder – TPU Update. Adding a bolt-on direct drive upgrade and replacing the Series 3 full assembly body.

The TPU update is a go. First, PLA is great. TPU is better for certain applications. However, we start with PLA. If you need flexibility over rigidity it is assumed that you want to test TPU filament. First, we will replace the existing assembly body on the MAX NEO and bolt on the new extruder to address the TPU issues*. TPU requires more force to drive the flexible filament through the assembly and out the nozzle. The direct drive will help with ‘refinement’ and focusing on pushing and pulling the filament more accurately and precisely.

Creality Accessories
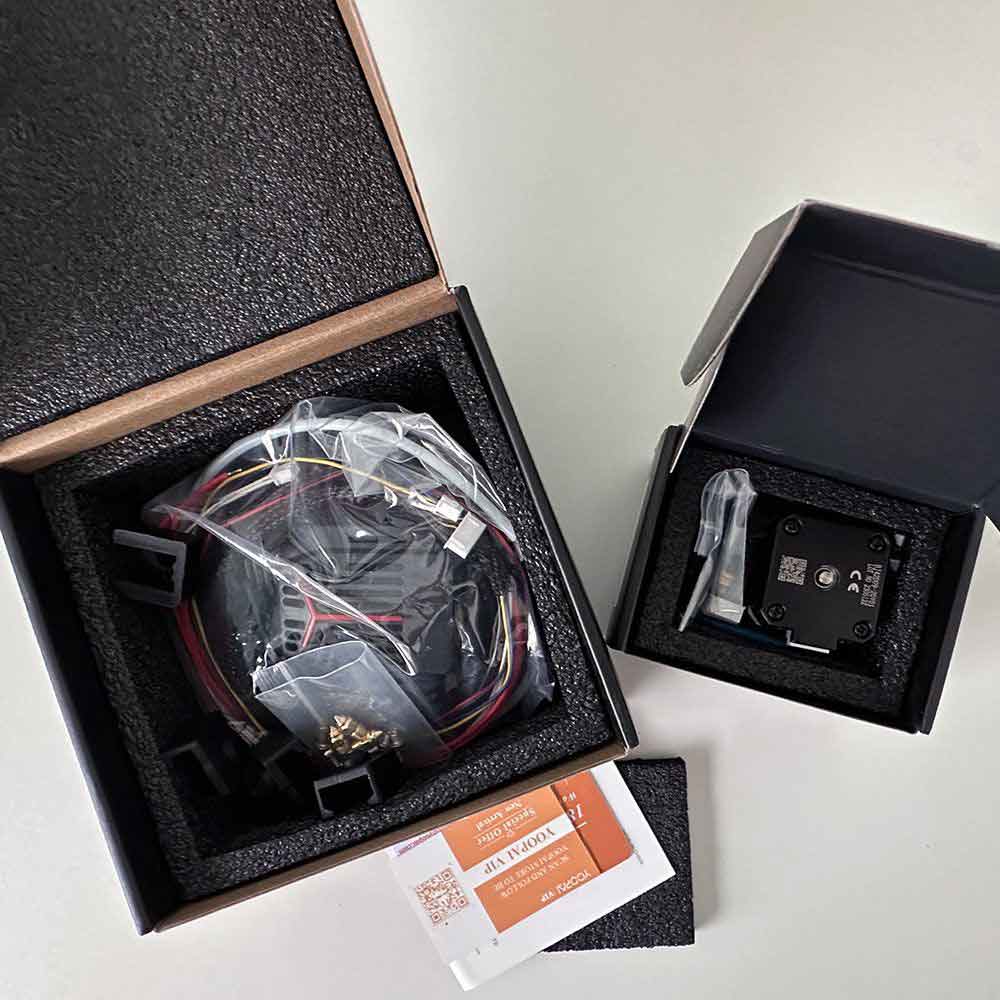
Unboxing

Unboxing

Drive Motor

Drive Motor

Assembly

Assembly

Remove Extruder

Remove Extruder

Unscrew The Fans

Unscrew the Fans

Assembly

Assembly

Again, in terms of next steps and the TPU Update, the update is not a *requirement,. However, after seeing enough test prints, it’s time to make the switch. Here is the bolt on solution from Creality for the Ender 3-Series, MAX NEO. Moreover, what do I mean by ‘requirement’ above? In my opinion, it would be extremely difficult to print TPU printables using a Bowden drive. I’ve tried, and it doesn’t work well. Finally, the Bowden drive doesn’t provide enough filament force and direct force to the filament through the hot end, hence the need for a direct drive motor. So, I want to emphasize that there’s no need to buy a new machine for TPU printing. Simply, do the swap and you can print both TPU and other high-temperature filaments as well.

Quick update: since this post was shared, we have received the parts for the TPU updates, allows us to begin the direct drive build. TPU filaments and prints can now be done without the necessary upgrades. Let’s get into the build and upgrade action! Side note, before we move off the direct drive action, I’d like to share other Halot updates including the Halot LCD fix and other break-fixes when adding a resin printer to your arsenal.

Stay tuned for additional photos and mini-clips covering the installation soon. In the meantime, here is a brief unboxing and assembly tear-down. Thanks!

Ender Upgrade Adhesion Issue

Adhesion Issues, Bed Temp, Roughen The Surface

Ender Issue 26

Latest Ender Chaos

Lab Work – Humor Is The Only Way Sometimes

The Lead, 6 hour+ print chaos; let’s address and tackle these Ender Upgrade Adhesion Issues.

We will put the Halot Sky Resin vat cover issue, on hold and focus on the Ender 3 Neo Max bed adhesion problems. It has taken over 5 hours to troubleshoot, with fans running and a cooling bed plate. There are numerous issues to tackle!

Let’s Troubleshoot
Extruder Pressed Down

Extruder Pressed Down

Bed Inspection

Bed Inspection

Extruder Removed

Extruder Removed

Sensor Globule

Sensor Globule

Heating Element

Heating Element

Mend

Close Up

Track Bands Off

Track Bands Off

Missing Tension Knobs

Missing Tension Knobs

Current Status, Visual Check

Secondly, we are missing hand-tension screws and tension belts. There is a literal mess of PLA covering 60% or more of the printer, extrusion head, bed and assembly. Fortunately, I walked in post-print as a tension belt was in the process of removing itself from the printer head.

Moreover, that concludes the visual inspection portion of the Ender Upgrade Adhesion Issue. Moving forward, we have the printer head back together, PLA cleaned off, tension belts applied. Next and not captured below, replace adhesion plate, tension screws, and restart the machine for calibration. Look for update posts here in the next day or two.

Next, what is the purpose of the print? Let’s replace the cover on the Halot Sky (V1) Resin vat, I am not sure where the original cover has gone – it could have been broken or lost. More importantly, the print itself was lost. From the perspective of the ‘pressman’, the printable seems to have failed to adhere to the build plate. Following a settings check, the discovery was around ‘ironing’ or issues around ironing. Also, the printer head was buried into the print plate. This is not good for the printer or its parts. Additionally, there was a concerning sound of tension belts releasing and printer head/plate friction. However, the print fix is currently being fixed, and we will provide an update at a later date or time.

Finally, we replace build plate, hand screws, springs, restart/update firmware and calibration.

Ender Filament and Adhesion Issues

Filament Challenges, Turmoil and More

3D Printer Adhesion Issues with PLA and TPU

Print Plate Surface Adhesion and Heating Issues

Lab Work – Ender Issues Defined

A few more weeks of Ender issues…

Ender Filament and Adhesion Issues, are causing a delay in the TPU Neo Max upgrade progress. I will be sharing more Ender ‘lite’ issues, as we continue the TPU trial and face filament challenges. The filament change was primarily for lab work on bait designs and future locking mechanisms where TPU will be more appropriate. Despite this tangent, core printing has not ceased, I am still facing challenges with PLA.

Ender Filament and Adhesion Issues

There are countless issues that seem infinite at the moment. Everything from Creality Software to Ultimaker Cura, Sonic Pad issues, filament running temp, and new surface temperature problems… we have a lot of cover. I will break these down into 2 or 3 new posts over the next week. We will also revisit surface adhesion. Surface adhesion and surface temperature seem to be causing most of the issues on the Ender Max Neo. I must admit, tinkering doesn’t always result in perfect prints, even 60% to 80% of the time. I won’t argue, I’ll just focus on testing… the more runs, the better chance we have of increasing that 60% likelihood of successful prints.

Pictures will follow,  as they say, a picture is worth a thousand words. The pictures will be shared to specifically cover thickness, fragility and test prints. Let’s get to printing!

Ender 3 Max Neo Filament

Printer Base Stabilization, Adhesion and Print Height

Filament Everywhere

Ender 3 Max Neo Filament Solutions

Lab Work – TPU Speed and Cycle Times

For this article on the Ender 3 Max Neo Filament, a typical print cycle might run between 2-5 hours, possibly more. While the standard range has been 2-5 hours, we are now looking at 12 – 16 hours. Recently, we have extended the top maximum run times to just under 12 hours for our test models. Surprisingly, both print tests resulted in the a mess.

Let’s Assess The Situation

For the record, a paper towel holder caused this issue twice. Upon initial observation, as the prints moved vertically (up the y-axis), the printing quality deteriorated. Somewhere between the 4″ and 5″ mark, both test prints went awry.

I’m starting to think there is shaking issue with the table or even a stabilization issue where the printer. is located. We can address both issues by printing the base slices, holder ends, screws, rods, and washers in a single print. Print these items separately to attach the towel roll and the rod. The rod that is slung between the holders can be printed in a secondary or tertiary step, This is mitigation issue number one, or we could address the stabilization directly. The printers are currently positioned where they stand, so there is not much I can do to move them around.

Once I received the new filament, we will print the rod. If it works, great. If not, then step two will be more tedious. The issue is mostly a space problem in the office. The filament should arrive later today, and I will post a quick summary once I finish printing the rod slice, assuming it is successful.

Ironically, a similar issue was occurring when I ran TPU through the machine. So we can conclude the Ender 3 Max Neo Filament post with this. Although I don’t think they are related, adhesion; more on software upgrades, filament PLA adhesion and TPU upgrade adhesion was the issue with TPU. Which we will address in a future post once we determine the correct nozzle temps, print speed, and adhesion setup. I have heard/read about using adhesion spray or glue stick. Another day, we will tackle those 3d printer issues/phantom printing phenomenon.

Explore Various 3D Printer Brands

3d Printers, New, Used Or Refurbed

Halot Sky

Best 3d Printers On the market 2023

Lab Work – 3d Printers

See 3D Poll Below (closed), participate in the ‘who’s who of 3D Printer Usage Brands and Manufacturers’.

The poll has since closed on 3D Printer Usage. However, what we discovered is interesting. The question was ‘What 3D printers have you used, any success’? We are specifically looking for a TPU thermoplastic polyurethane (TPU) filament option. Tests with the NEO Max have been inconsistent, mostly unsuccessful, unless we swap out filaments. Interesting right? More on the Creality series of printers, Ender Series, Halot and Prusa products. There are others of course, Elegoo, Dremel, Prusa (mentioned prior), Bambu Lab, and Anycubic.

We have generally, for the focus of this 3d Printer Usage message, have been more around product similarities and commonalities with Creality. Choosing to stay brand agnostic per se. More choice, choosing Creality maybe four years or more. Today, we are looking for the best TPU lite printer. Do you have any suggestions regarding 3D print usage or brand? We have used Dremel for cutting and sanding, typical applications for a Dremel tool. As for Prusa, we have only used their products in theory, as some items we have purchased were made via a Prusa lab or outsourced printer. Anyhow, we are looking for feedback or comments. Please kindly leave your commentary below.

Please note, if you’re looking to swap out resin liners for the CL-89 model, it is advisable to purchase a number of them in advance, as they can be difficult to find when global stock is low.

New Halot Sky LCD

Creality Halot Sky Update

Halot Sky LCD Replacement

Creality Halot Sky Resin 8.9″ LCD Change Out

Lab Work – LCD Screen

I know, we started the last post with “Before you start your own 3D printing…”; this post does follow suit. Let’s hop into the new Halot sky LCD swap.

It looks like a bad LCD screen, that needs to be replaced, as well as the film stretched over the resin vat or possibly just some resin damage, for that matter.

We replaced the monochrome LCD screen on the deck of the Halot Sky while we wait for a new FEP resin vat. Please note, if you’re planning to change resin liners (if you manage to find the correct ones for CL-89), it’s a good idea to buy several of them because they can be difficult to find when global stock is low.

Swapped LCD Screen

Swap details: Deconstruct by removing all screws, covers and metal panels. Be careful to disconnect the wires and ribbon cable for the touchscreen. Replace the screen ribbon in the quick connect being careful to reattach the ribbon and black wire for the touchscreen.

Two, clean up any resin residue, pour over, and spillage now. I believe this is  where we made a mistake. The spillage got under the screen, as shown in the featured image for the article. Have a bottle of alcohol on hand to make the cleanup process as easy and effortless as possible. It took about 15-20 minutes in total, as I mentioned, due to the large amount of spillage. Finally, remove the ribbon tape surround and a few screws to gain access to the LCD screen.

Ideally, you’ll want to take your time, being careful to not to rip the LCD tape, or misplace a screw. If you do lose any items, you can always find new pieces in the Spare Parts. If not, try the eBay shop. We will provide a link to our wares but it’s taking some time due to logistical issues. We also sell out items on eBay from time to time, so check them out – we currently have some King books available.

Liner Change
Halot Liner Change

Internals

Halot Liner Change Out

LCD Change

Halot Liner Before Change Out

Change

Halot Liner Before Change Out

Liner

For those who only need the FEP release film, or for our future reference – FEP Release Film – (search eBay for FEP Release film). A side note: FEP film can be hard to find, so eBay might be your best source. If i were a betting man, which I’m not, eBay or Amazon might be the only two sites where you can find spare parts and film. Cheers!

Before we move off the Halot updates, I’d like to share other Halot usage, new Creality series, break-fixes, and finally the idea of adding a resin printer to the 3d printer arsenal.

As usual leave a comment below, let us know what you’re thinking?

Backup Satellite Phone Batteries

Keep It Fresh, OEM Backup Batteries

Need Another - Inmarsat

Inmarsat’s Got You Covered In An Emergency

Gear – Full Charge with the Inmarsat Satellite Phone Backup Batteries

Get yourself a backup battery: the BlueCosmo Inmarsat Sate-phone 2 Battery – OEM  (Original Equipment Manufacturer) batteries.

As storm season rolls in the South and those of you in the Great Northern States dig out of blizzard-like conditions over the weekend, emergency gear becomes a priority. Stay safe and ready. Storms may come and go, but keeping a steady supply of back up batteries, plugs, chargers, etc. can be a logistical nightmare. Having two, backup batteries on hand is always great for when you need them most-like Hurricane Ian.

Like Ian, Michael, Irma or Wilma, it’s important to prepare now. In the event of a catastrophe, I always make sure to a couple of spare items. For example, backup wires or charging cables, to ensure that everything keeps running  smoothly. I recently posted about the OEM battery as a reminder, but perhaps we should also discuss different battery types, such as those from manufacturers, for the sat phone. You can find great gear, parts or Inmarsat Satellite Phone replacement batteries online. Need a charge? Have a look at the Schumacher Charger, the NOCO Jumpbox, the Matrix Bench Supply and even a 9v battery in a pinch. Various chargers with means to charge your technology in an emergency, storms or traveling abroad. Gone are the days of needing multiple batteries for your cell phone.

Mobile Emergency Charger

Construct An Emergency Charge

Camping/Offgrid Charging Option

In A Pinch – Grab a 9v, a Car charger, electrical tape and a nail

Lab Work – 9v Charger Hack

Before you start criticizing me me about wattages, amperage, safety, or reality etc., I want to clarify that I meant to post this back in December, but didn’t get around to it until now.

The scenario is familiar –  no power due to  a storm outage or a dead car battery, and you find yourself in a bind .You phone is dead, and you need a charge. This hack can be a lifesaver when you’re away from home comforts whether you’re camping, off-grid, or stranded due to breakdown.

Hacks, Emergency Use

I usually avoid cellphone hacks, but this one caught my attention as we enter hurricane season.  Having experienced storms, tornadoes, hurricanes, and the like, I know that sometimes the simplest things can make a big difference in a power outage. I’m not suggesting you hoard batteries, clicky-pens, nails, and used charger cords, but it might be wise to have a few on hand, just in case.

This hack has been around for sometime. Some people believe that off-grid living and underground living may require alternative power sources, and this hack could be just what you need. In any case, we spliced together a few generic charging cords, added a car charger, and a few 9v batteries, and voila! We have some juice for the cellphone battery.

Supplies, Cut, Twist and Charge
Backwoods Charger

Supplies

Backwoods Charger 2

Cut/Twist

Backwoods Charger 3

Battery

Backwoods Charger 4

Taped

Power Supply

This hack might work even better. This hack might work even better if you can find a different type of battery, such as an RC/Drone battery considering 9v, LiCB or 4s/5s LiPos. Try a power supply where applicable. Whatever the case, you may have these items lying around your home, office, or shop, depending on your situation. We have these items in our workshop, so you can imagine how handy they might be in serious storm or power outage situation. 

Like the quick fix format? Check out other quick fix content here such as this disposal problems fix. Like the learn to descale your coffee equipment – pots and machines, fix a toilet float clean and fix a pool filter housing and filter which is like this cell phone charging hack… Check them out!

As usual leave a comment below, let us know what you’re thinking?

Halot Sky Break-fix

Creality Halot Sky Troubleshooting Break-fix

Halot Sky vat liner

Creality Halot Sky – Resin Liner Change Out

Lab Work – Working Out The Bugs, Halot Sky Resin Printer

Before you begin you own 3D printing, journey, including purchasing a 3D printer, we need to discuss break-fix: the Halot Sky Break-fix which follows up on the LCD replacement just a few months ago.

First, it is crucial to understand how to maintain and troubleshoot printers. The same applies to addressing major printing issues, such as breaking down the entire printer to the board level. This also includes dealing with misprints, which can occur frequently. Proper care, cleaning, and resin management are essential tasks, including swapping resin liners and cleaning resin drips meticulously. 

Liner Change
Liner Frame

Liner Frame

New Liner

New Liner

Attached are few sneak peek video clips and photos of our latest test prints and demos. We have some ‘real-world’ solutions coming soon. More creations on 3D software and 3D applications such as TinkerCad, Autodesk – AutoCAD, Creality (design) software, SolidWorks and more. We have started with TinkerCad and AutoCAD so that we can print prototypes and  finish products within a few hours. Got any ideas? Need 3d prints? Leave us a comment or drop us a line on the Connect. Please include: file type, filament, sizes etc. Let’s see what we can come up with! As usual leave a comment below, let us know what you’re thinking?

New Creality Series

A Makers-space Featuring Creality 3d Printers

Creality Series

Creality 3d Printing Series – Ender 3 Neo Max & Halot Sky

Lab Work – Creality Settings

3D printing? If you have a need, give us a call. We will be posting a handful of new work in the weeks to come. From testing and prototyping, to 3D model printing and extruding, resin printers versus PLA/TPU filament printers, the the trials and the tribulations i.e. issues we faced while running our 3D printers. Check out the latest Creality Ender series printers, as we will be covering the Max Neo in this article.

I have attached a few sneak peek video clips and photos of the New Creality Series, showcasing our latest test prints and demos. Als have some ‘real-world’ solutions coming out soon. We will also be putting out some polls regarding 3D software/applications – TinkerCad, AutoCad, Creality (design) software, SolidWorks and more. We have started with TinkerCad and AutoCad so that we can print prototypes to finish products within a few hours.

In The Lab
Creality Tablet

Creality Tablet

Prototypes

Prototypes

Got any ideas? Do you need 3D prints? Leave us a comment, drop us a line on the Connect, please include: file type, filament, sizes, etc. Let’s see what we can come up with!

As usual leave a comment below, let us know what you’re thinking?

Ender, Halot & Prusa 3d

3d PLA, Resin and TPU Printers

Halot Sky Resin Printers

Creality, Prusa or Something else? Ultimaker

Gear – 3d Printers

With the holiday season in full swing, thought it might be worth while to do some research on a 3D printer… Should we go with Ender, Halot & Prusa 3D? Should we choose extruded filament or resin? Which brand offers the best cost/benefit ratio?

More on the Creality series of printers below same for boards and software for the Creality brand. I want to be careful not to exclude other brands of course, feel free to check out Elegoo, Dremel, Prusa (mentioned prior), Bambu Lab, and Anycubic.

After conducting our research, in shop testing, we found a printer that meets the shop needs. Once the device has been received, we will provide more information. Stay tuned for updates on the device, our 3D lab startup, and our first runs. Let me know in the comments below: should I choose Prusa or Creality CR Series Ender series or Halot Series?

3D Printers
Ender 3d

Ender

Prusa 3d

Prusa

There are a couple of different models, filament types, series, etc. to choose from. We are considering the Ender 5 Plus, Halot Series (Resin) versus the Prusa I3 MK3S+. Perhaps some other tools to go with the printer as well, such as wash/cure, filament, bed, boxes/enclosures, etc. There are lots of options to consider. The point is, we are looking for the best option for the shop. Help us understand why and what factors might have influenced your decision to purchase a 3D printer. Should we choose something else? Dremel, MakerBot, Ultimaker, LulzBot… there are more options out there, but it is time to narrow down the list.

As usual leave a comment below, let us know what you’re thinking?

AirMap by DroneUp

Take Flight, AirMap by DroneUp

Airmaps - Drone Flight App

AirMap for Drones, Setup and In-Flight App

Tech And Tools – Fly With Confidence – Airmaps

Get FAA approval to fly with AirMap by DroneUp… Are you looking for FAA compliant drone flight apps? Airmap makes flying easy  and understandable. Fly with confidence while staying within legal requirements and having the knowledge to fly approved. 

From installation to usage, AirMap by DroneUp for iOS or Airmap – for Android will help you understand what is happening in the airspace above you, how to fly with approved FAA flight status, log your flights, and more.

Airmaps iOS And Android
Welcome

Welcome

Connect

Connect

Log In

Log In

FAA Plan

FAA Plan

Airmaps Zones

Zones

Airmaps Search

Search

Airmaps Restrictions

Restrictions

Brevard County

Brevard County

From t’s & c’s, to maps, flight logs and FAA approval to fly safely, make sure th get approved with FAA-approved flight requests. Check Kennedy Space Center to learn about the airspace above and around Kennedy. Familiarize yourself with the warnings and requirements, as well as the maps and flight restriction in and around the areas within your airspace.

Need more flight apps, or drone apps for flight approval? Leave us a comment below and we will find some additional drone apps for you. While you’re here take  a look at other FAA related articles, FAA Hurricane Update from 10/1 and FAA Drone Safety from 4/19. Although these articles are now archived, it’s important to remember that drone flight rules are drone rules. Most importantly, make sure to stay compliant and safe while flying.

FAA Hurricane Update

In the Know, During Inclement Weather

FAA Hurricane Alerts

Hurricane Ian Alerts Update

Materials – FAA Hurricane Update

Know What To Do Pre/Post Hurricane Ian – Before you fly, understand the current conditions in the sky above you…

FAA Hurricane Update. Remember, the drone industry is constantly evolving, growing and maturing. Drone enthusiasts will always want to fly, so be sure to prioritize safety. This year, the FAA has organized a safety awareness day for drone pilots, federal representatives, educators, drone hobbyists and more… On June 18, 2022, join your fellow drone pilots for FAA Drone Safety updates and drone safety days. To participate – look for ‘about drone day’, support, or host an event. This message is in reference to FAA notice number” NOTC2405. For those seeking more information or a drone piloting app, consider trying Airmaps.

Give Airmaps A Go

For those of you who are interested in learning more about open FAA communications, licensed drone updates etc. feel free to reach out to us or leave a comment below. Don’t forget to look up more information on Airmaps, download if you can. Great all-in-one app for drone flight and the need to stay safe. Especially for those flying during inclement weather, storms and night-time flight. I’ll post more FAA, FAA Hurricane communications in the future.

GTRacing Gaming Chair Update

GTRacing Repair Update

GTRacing Update Frame Fixed

GTRacing Chair Frame Blunder

Gear – GTRacing

So, here is the GTRacing Update. GTRacing Chair Parts Replaced.

It may be premature, but, good on you GT Racing! Dare I say GTRacing made it right? The chair is back together, holding weight as it should. No lean, squeezing, bending-feeling or crash. That’s good, we have a fix. In hindsight, while being desk chair free for a week or more, is not ideal.

The second “chair part”, the one not broken will be relegated to the game and electronics drawer. It goes with the other unused cables, plugs, charges, wires, random batteries etc.

While we have your attention, we will be trying other GTRacing parts, chairs etc,. A full listing will come, however, a sneak peek may serve its weight in gold here… Check out the latest merchandise after the GTRacing Update, and give us a shout if you would like to purchase our gear – new products next quarter.

Side note, with the GTRacing gear, we are looking to sort out some USB devices, stickers and magnets, depending on demand. Let us know what you think about the merch, or if you’re looking for something special, a one off, special order on GTRacing – https://gtracing.com/. If you’re interesting in our new chair, check out our new GTRacing chair sporting new GTRacing ergonomic mesh.

SPOILER – Fast forward, gear adjustment, learn about our new GTRacing Mesh back chair with the lounging feature and footrest posted 6/2024… enjoy!

iRobot Roomba 900 Series Teardown

Refurb Process, Maintenance and Care

iRobot Roomba 900 Series

iRobot Roomba 900 Series Teardown

Lab Work – iRobot Back At It

Got a broken robot? We can help! Some might say that’s the worst, but fear not – the iRobot – 900 Series is here to save the day.

Let’s start by fixing this thing with an iRobot Roomba 900 Series Teardown. The great thing about iRobot/Roomba products is that they are easy to fix! Unless the board is fried, the main housing is smashed, or the plastics are destroyed. Even in those cases, parts are fairly easy to find. The key is to source, clean, install, and maintain what you have. Most, if not all, of this particular Roomba was fine. A good cleaning at the end of the repair was worth its weight in gold.

Robot Teardown and Repair
iRobot Roomba 900 Series Teardown

Teardown

iRobot Roomba 900 Series Teardown

Battery

iRobot Roomba 900 Series Teardown

Cleaning Bars

iRobot Roomba 900 Series Teardown

Bin

iRobot Roomba 900 Series Teardown

Repaired

iRobot Roomba 900 Series Teardown

Test Run

For those of you who don’t regularly electronics, robots etc. weekly, monthly or ‘NEVER’… friendly reminder, whatever the electronic device may be, they do yeoman’s work if you take care of them after every one or two uses. Additionally, the more you maintain them, the less you will have to throw. Remember, no pain, no gain.

A few tools to mention below, reiterating the previous comment, these are fairly simple to fix… for now. Learn the art of robot care, become a ROOMBA master sensei. This is a huge advantage for iRobot:

  • iRobot Home App
  • Philips Screwdriver (Rechargeable Drill* DeWalt 20v)
  • iRobot – Brushes, collector rollers, caster wheel and filter
  • Cleaner – Windex
  • Cleaner – Sprayway
  • Compressed Air
Links, Conclusion and More Repairs

In closing, I’d like to share some other articles, more recent articles on robot repair, 3D printer upgrades RC (radio controlled) and robot repairs, check out these articles.

Moreover, let’s look at a Bench Power Supply – Matrix Bench Power Supply, the need to power on electronics when the damaged robot or device is on the bench in pieces. Next, and one of my favorites, the Maytronics Dolphin On repair, explore water intrusion and effects of water intrusion, water damage and power unit swap. How about the Ender Direct Drive Upgrades – TPU Post Processing Update, a 5 part series on filament types, application of filaments, upgrades, troubleshooting and more.

Final link, check out the EMAX TinyHawk Repairs… more fixing, soldering, and flying. There are more articles in the TinyHawk series, approximately 6 or 7. Be sure to check those out, as well as the iRobot series continues. More recent work, but it helps tie in ‘process’ and troubleshooting unknown errors and testing.

FAA Drone Safety Update

Update: FAA Drone Decision, Flight Over People & Flight At Night

FAA Safety Warning

Flight Awareness, Times and Resources Now Available

Materials – Flight At Night

FAA Drone Safety Update – Notice Number: NOTC1758

FAA Drone Safety Update it’s time for some training for you Part 107 license holders. What about the waivers? The waiver deadline is April 21, 2021, so please make note of that date. Requirements for flight at night and/or over people, moving vehicles still require FAA waivers that date. Moving forward, waivers and requirements will need additional information, especially for flights over people and/or at night.

My assumption, after speaking with the FAA, is that the traditional licensing examination and process will change. It is likely that licensing for unmanned aircraft will be more similar to the boating license process in Florida. This may involve a classroom environment, quizzes, and tests on practical knowledge and safe flying. Let’ wait and see what updates and regs. are implemented. I am not comfortable speculating on the matter, how they will happen and when. You can be the judge!

Side note, FAA Drone Safety Updates are on going, so continue to use and test Airmaps  for the latest updates. How about disasters and hurricanes? As described on Airmaps some forum responses were lost in the purge due to a spammer attack. It will help you stay informed about regulations and rule updates.  

FAA Drone Update
B4UFly

B4UFly

DroneZone

DroneZone

Check out the FAA’s Low Altitude Authorization and Notification Capability (LAANC) B4UFLY App, FAA DroneZone or give the FAA a call or email for clarification. It’s pretty straight-forward. As always, feel free to leave a comment below and let us know what you’re thing! Fairly straight forward. As usual leave a comment below, let us know what you’re thinking?

EMAX FC and Betaflight

Install EMAX Flight Controller with BetaFlight

BETA FLIGHT

Fixed: EMAX & Configurators via BetaFlight

EMAX – Betaflight

Betaflight Config – Today, we (you and I) tackle some drone issues… make/model drone controller configs ((same drone, FRSKY controller profiles)), soldering/replacing EMAX AIO FC, and BETA config issues. Photos to follow.

In the meantime, sit back and relax, enjoy… enjoy the pain, the torment, cause I’ve been at this for days… Literally, days. Nothing but borrowed time; borrowed not wasted! Link above will get you your very own Betaflight configurator via Chrome extension.

FC And BetaFlight
Betaflight Receiver/Modes

Receiver/Modes

Betaflight

BetaFlight

Betaflight PID Mode

PID Mode

Betaflight Notes

BetaFlight Notes

Like most things, there are more ways to make your cake and eat it. The Chrome extension is helpful when bouncing back-and-forth between systems/releases/drones etc. I run Big Sur MacOS, Ubuntu Linux and a Win Server 7… it’s handy here, as the config remains the same, helps to maintain a certain sense of sanity. Especially when you’re a NOOB.

Two, from time to time, I run my Win7Server via MS Remote Desktop or Linux instance via (https://www.virtualbox.org) – Oracle’s Virtual Box. One advantage might be number of USB ports available… as you know, most MacBook Pros are limited to 3 of 4 USB-C ports. Unless you run usb ports, which I don’t care for (B.S. but that is for another day). Anyhow, regardless of how you run Betaflight, be aware of the nuances, versioning and pitfalls with each new iteration or release. Take notes, take screenshots, vlog about it… anything to help you remember the ‘deltas’ (change) over time. These will come in handy the next time you crash or repair your drones. Notes and support can be found here: Betaflight – Github Notes/Docs Moreover, issues came up when I swapped AIO boards, soldering power and reconfiguring modes.

For more information, I posted more about the config, more on eMAX TH2, other eMAX updates, various configs like EmuFlight and BLHeli, look for 8/17/2020 post – eMAX Fix updates Part 1 and Part 2.

EMAX Fix – Part 1

EMAX Repair Start

eMax TH2

Hack-A-Thon Part 1

Lab Work – EMAX Fix – Part 1

On The Bench – TH2

Assess The Damage, Teardown

Back from the airfield, EMAX Fix – part 1. Be sure to check out the rebuild of in this series in the EMAX Quad Motor Rewire Video posted just before.

The airfield was clear, with no traffic, especially over in the helicopter and quadcopter area, so we were good to go. I unpacked the TH2 from its flight bag, got it out and up in the air with no problems.  After a final check of the batteries and controller, we were ready to go. The weather was clear, and according to the flight radar, it was a clear day with mild temperatures and wind gusts of around 2-5mph. So, up we go!

Teardown
Reattach Antennae

Reattach Antennae

Solder Antennae

Solder Antennae

Antennae Position

Antennae Position

Lift is good, strong, and perhaps the easiest part of controlling the drone in flight. These drones when properly tuned , offer a smooth and vanilla flight experience. Be sure to check out the binding process using BetaFlight to bind/connect the flight controller to the remote.

There are a lot of things happening at once when flying the EMAX drones. You have to be mindful of your location, both as you ascend and descend. The flight went well, as planned/expected. I did a few loops, full power, turns, and hard bankings just to set the pace. Don’t forget to check the battery warning before your flight.

Power Leads, LED’s
Soldering 2

Clip Leads

Cut Replace

Resolder Leads

Leads

Clean Power Leads

Prep Solder

Set Leads Properly

resolder

LED Seated

Now, at this point it was time to bring the TH2 home safely. As you can imagine, trouble came knocking. Damage report, minor issues included 2 LED strips out, severed antenna, severed power leads loose (+positive lead), and burned or malformed poly-frame. Don’t forget, this might be a good time to talk about light weight, super adhesives like Starbound – Super Fast. Which can be used, sparingly to tack down the led leads. We fixed the issues by clipping and prepping for new wires, ordering new LED strips and poly frame, replacing the antenna, re-soldering leads, and shrink-wrapping wires where applicable.

Similar Emax status update, time has moved on since the original article and I wanted to share additional Emax content where applicable. If you’re looking for Emax content,  give these a shot (in reverse order from this postings date) – ReFit Emax Flight Controller, Emax Fix Part 1 (this article) and Part 2, Quadcopter Rewire, and the TinyHawk 2

Wrap Up Part 1

Find EMAX parts, and more, through our Amazon Affiliate links, or visit the  EMAX – US Store. For additional reference, check out the UAV Performance software used to update and run the EMAX TH and FRSky Taranis QX7s controller or more from the devs of Betaflight. Own it and have fun!

Venice RC Airfield Bound

Venice Bound, Let’s Test The Recent PH4 Gimbal Fix

The PH4 At The Airfield

Drone and RC Airfield

Lab Work – PH4V2 Gimbal

Airfield Bound – PH4V2 FIXED

Fixed Gimbal, freshly removed from the DJI packaging and repacked in the field case. Off to the club airfield in Venice… We are off to fly the drones! Re-posted.

Fresh Upgrade
Refreshed

Refreshed

It’s nice to see the drone back in working order, taking to the sky. Two, completed the requirements to fly professionally, completing and passing FAA 108 test for Part 108 Licensing. Must do, if you plan to fly professionally, beyond a hobbyist, or to take in an income based on flight. In the meantime, let’s get the drone up and push it through its paces…

Those of you who are interested in videography and flying drones, check out the drone shot article below. I don’t normally call out manufactures content or help videos, however, added a few drone shots, The Reveal, Panning, Orbit and Overhead Flight. DJI has nice article on drone shots, and how you might incorporate those shots into your flying arsenal. For more Airfield Bound articles or information on the gimbal issues, or other airfield flight tests, learn more.

As usual leave a comment below, let us know what you’re thinking?

eMax Quad Rewire Video

eMax Quadcopter Rewire, Resolder & Power On

Patching Up the eMax Quad, Watch the eMax Quad Rewire Video

Lab Work – eMax Quad Rewire Video

We cover the eMax Quad Rewire Video for future reference… following the crash, a few activities are in store…

Quick Take

Time to replace the eMax TH2 air frame, flight controller (FC) or FC Board, motors, motor wires and fan blades. Here’s a quick eMax drone rebuild.

A quick peek underneath, revealed a few more items, copper leads, LED’s, alarm and flash FC board data to get the drone back to working condition (or as expected). This post really celebrates the fix itself, showing the motors work properly, alarm for arming/disarming the drone for flight and visual confirmation the LED’s do in fact work as expected.

Visual Inspection

The video, although short, helps to describe working condition, press play to reveal post soldering work on the bench and FC updates via BetaFlight. Time has  moved on since this original video/video post, however, I wanted to share other eMax content where applicable. In fact below, there are a few links to see the work in progress or the actual fix while on the bench (which is a three part project). So, give those a look for more background or context for the final post here.

If you’re looking for eMax content,  give these a shot (in reverse order from this postings date) – eMax FC, eMax Fix Part 1 and Part 2, Quadcopter Rewire video (this post), and the TinyHawk 2 mini project. More to come, stay tuned.