Personal and professional growth, benefits of identifying positive and negative transformation or next steps forward. Take a swing, small steps.

iPad Mini4 – Screen Swap

iPad Mini4, Let’s Replace the Screen and Digitizer

Digitizer Screen Swap
iPad Digitizer Swap

Lab Work – Digitizer Replaced

iPad 4 Mini – Digitizer Swap

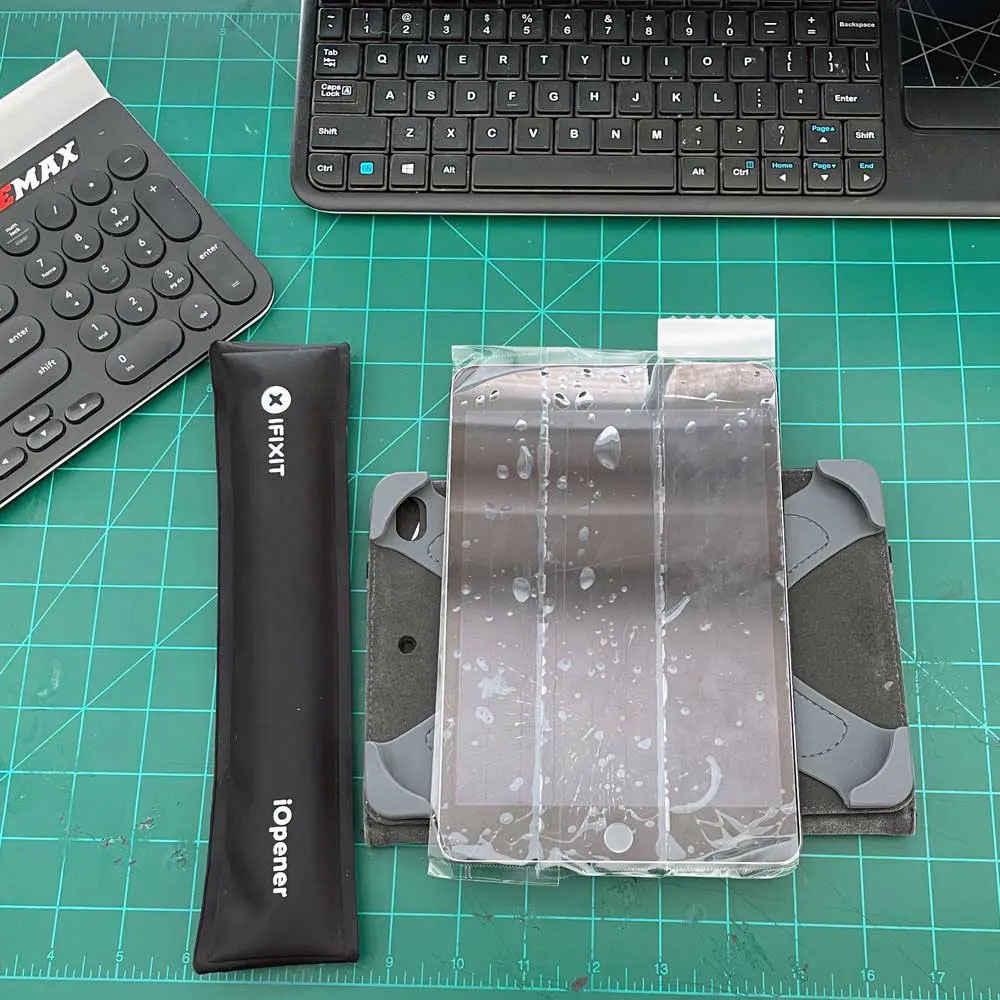
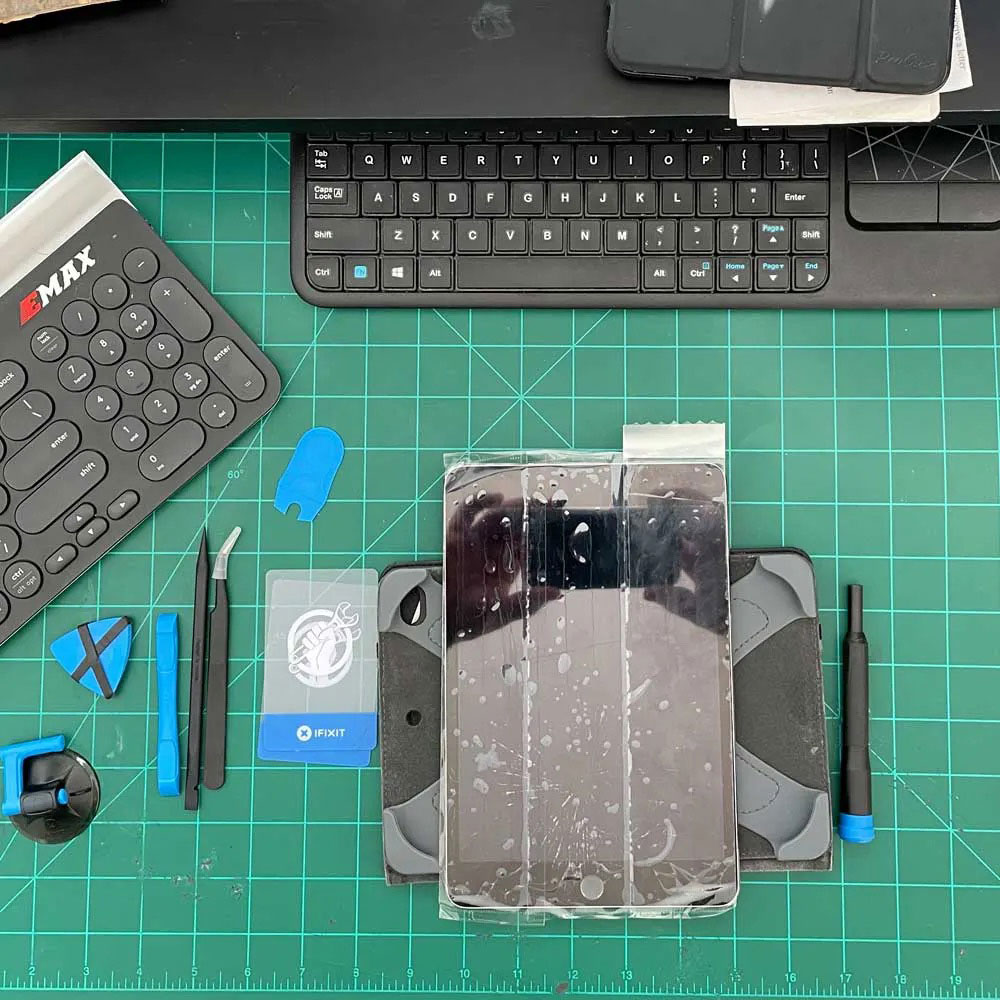
Take a peek under the hood and check out the iPad Mini4 – Screen Swap timeline. From start to finish, it only takes a quick 20-30 minutes to complete. Just remember to remove the power flex connector before the screen/digitizer flex connections. We have included a followup picture in the timeline that demonstrates the recommended tools and method for removing those flex connections. Additionally, when dealing with the button assembly housing and home button, be sure to handle them with precision and care. Taking care of the button and its connections will make a significant difference in the long run.

  • Packing Tape
  • Heating Element – Water Based, or Heat Gun
  • Pryor triangles
  • Suction Cup/Pry Clamps
  • Tech Screwdriver set
  • Curved Tweezers
  • Pressurized Air
  • Anti-static Wipes
iPad Screen Repair
iPad Mini4 - Screen Swap

Tap Screen

iPad Mini4 - Screen Swap

Heating Glue

iPad Mini4 - Screen Swap

Start Removal

iPad Mini4 - Screen Swap

Shim Screen

iPad Mini4 - Screen Swap

Unscrew Shield

iPad Mini4 - Screen Swap

Gain Access

iPad Mini4 - Screen Swap

Digitizer Connector

iPad Mini4 - Screen Swap

Digitizer Cracked

Let us know your thoughts on the moderate difficulty of The iPad Mini4 – Screen Swap if you are knowledgeable in this area. More Apple tear downs and repairs, like this Late ’18 MBP Battery Swap  or M1 Chip Touchbar swap. There are more, like this Mini 4 digitizer repair, which takes approximately 20 minutes from start to finish. If you encounter any problems,  Apple Self Services options are available, as well as Apple Parts – https://selfservicerepair.com/en-US/home – case you encounter any difficulties or obstacles. Feel free to reach out to us, as we are more than happy to assist you!

As usual leave a comment below, let us know what you’re thinking?

D90 Firmware 1.1

D90 Maintenance and Firmware Updates

Update – Firmware v2.0

D90 - Nikon

Materials – D90

D90 Archived Update

First, it’s time for an update. It has been a few years since I last updated the software on my Nikon D90, so the time has come to do do. Since the camera itself has been archived by Nikon, we will treat this article as a reference materials as well. While the D90 is a cool piece of gear, we also want to assist those who are looking to preserve their cameras. Therefore, the focus of this article has shifted a bit. It is now centered on firmware, where to find the downloadable content, and how to continue maintaining the D90.  Let’s make sure we update the D90 firmware from version 1.1 to version 2.0.

The D90 has been archived by Nikon, and you can find more details on the  Nikon D90 Website. Check out the archival pages for more information. I am sharing a few photos of the D90 a.k.a “Dub9” DSLR. Can I call it a “Workhorse” still? It may not have been at the top of the market in its day, but with a little love, care and a few minutes, you can bring your D90 up-to-date with the D90 Firmware version 1.1 update. When updating, make sure to use the correct SD cards to protect your memory cards and camera equipment.

D90 Update
Update Camera

Update Camera”

Covers On

Covers On

Updated

Updated

Don’t forget to leave a comment! Also, be aware of a few “gotchas” during the process. Backup all photos and video before starting. It’s best to back up before beginning. Remove any add-ons and modifications where applicable, especially any aftermarket parts and accessories that are attached. We want to have a common baseline before the firmware update. Reinstall aftermarket parts and accessories after the update process is complete. Test out anything you think might need a few extra minutes. Otherwise, after the firmware update, you should be good to go!

As usual leave a comment below, let us know what you’re thinking?

Late MBP Battery Swap

Check out the Late MBP Battery Swap and Repair

MBP 15″ Swap

MBP'13

Lab Work – Late MBP Battery Swap

The teardown and do the Late MBP Battery Swap Repair

Let’s get it! Before we begin, below are photos of the repair process. We are working on a 2013 MacBook Pro “15 Retina laptop with a new battery. Please ensure that you have selected the correct replacement parts, preferably OEM battery parts.

Find The Right OEM Parts, Find Primary and Secondary Parts

First, it is recommended to use OEM Parts, and even a second-hand OEM battery may be a better choice than non-OEM part in this case. OEM parts can be purchased from various websites such as eBay, Apple Parts, Apple Self Service Website, and iFixIt. When performing the repair, it is important to be cautious and take your time. Power and grounding are crucial, so be careful not to energize parts once the case has been unscrewed and removed. Additionally, it is helpful to have a few other items on hand for the repair.

Tools and Repair Kit for the Late MBP Battery Swap

Some other tools to have around the shop might include the Jakemy screwdriver kit, which  contains Torx, hex and star bits. These are key for newer technology bolts and screws used in the assembly process or to hold hardware to the board. Additionally, it’s important to have glue tech adhesives and glue release, gloves, safety glasses, and a welding/soldering mat. These are all useful bare minimum tools to have, including glue release, a tech screwdriver set, and glue adhesive. 

MBP Swap
Late MBP Battery Swap - Macbook Pro Battery Replacement Unscrew, Pull-back battery cover, Pop-off Battery Connection

MBP Unscrew

Macbook Pro Battery Replacement - Un-glue Battery process

Battery

Late MBP Battery Swap - Macbook Pro Battery Replacement - Un-glue Battery process 2

Remove Glue

Macbook Pro Battery Replacement - Un-glue Battery process clean up

Glue Remover

Late MBP Battery Swap - Macbook Pro Battery Replacement

Remove Battery

Macbook Pro Battery Replacement

Swap, Replace Battery

Late MBP Battery Swap - Macbook Pro

Ubuntu

Apple Certification, Apple MacBook and Robot Repairs

At this point, I’ll assume you are interested in repairs and may want to learn more? Equally as important are the OEM parts as the knowledge to do the repair yourself, intelligibly. Are you searching for parts for your own device? For more detailed information on the Late MBP Battery Swap and the power on and boot process. Check out IOS certification Apple Certs. Lastly, have a look at this particular MacBook Pro “15 Retina tear-down via IFixit MacBook Pro “15 Retina Late ’13 Tear Down.

In conclusion, more tear-downs and repairs, check out the iPad Mini Fix, Roomba 900 Series Fix or some of our latest MBP Screen & Keys and MBP Touch bar fix. Enjoy! As usual leave a comment below, let us know what you’re thinking?

ReFit EMAX FC

Cut, Fit & Refit

EMAX THS & Flight Controller Board

EMAX Cut, Fit and Refit

Lab Work – EMAX Flight Controller

ReFit EMAX FC

I thought we could revisit the EMAX FC repair on the EMAX THS. I’ve want to follow up on the previous post, focusing more on the specific, showing the repair process and refitting the EMAX FC. Along the way, I’ll share additional photos of the process as well (in case you come across this article and are in a similar situation with a failing FC). Let’s cover the entire process from start to finish – disassembly process, cutting soldering, and test flight. Once again, soldering/replacing the EMAX AIO FC. Enjoy the photos.

Drone Repair Photos
New Parts

New Parts

THS

THs

EMAX FC

EMAX FC

Drone Frame

Drone Frame

Add Connections

Add Connections

Reattach Power

Reattach Power

Once you have all the parts, fitted, soldered and ready for flight, we will need to configure the FC. Rest, bind, configure and fly, in that order. Check out the EMAX FC and BetaFlight post for more information. You can also learn more about the repair, configuration process and in-flight troubleshooting. If you are having troubles, log into the EMAX Support Portal for assistance with your EMAX products. Lastly, I want to reiterate the steps to fix the FC – Support EMAX THS, remove EMAX FC screws from the Drone PC frame, Cut/Add Connection to Board, Re-Attach New Power Connector with the Battery Carrier”. Time has  moved on since the original post, I wanted to share other Emax content where applicable. If you’re looking for Emax content,  give these a shot (in reverse order from this postings date) – Emax Fix Part 1 and Part 2, Quadcopter Rewire, and the TinyHawk 2

As usual leave a comment below, let us know what you’re thinking?

EMAX FC and Betaflight

Update EMAX Flight Controller with BetaFlight

FIXED: EMAX & Configurators –

BETA FLIGHT

EMAX – Betaflight

Betaflight Config – Today, we (you and I) tackle some drone issues… make/model drone controller configs ((same drone, FRSKY controller profiles)), soldering/replacing EMAX AIO FC, and BETA config issues. Photos to follow.

In the meantime, sit back and relax, enjoy… enjoy the pain, the torment, cause I’ve been at this for days… Literally, days. Nothing but borrowed time; borrowed not wasted! Link above will get you your very own Betaflight configurator via Chrome extension.

FC And BetaFlight
Betaflight Receiver/Modes

Receiver/Modes

Betaflight

BetaFlight

Betaflight PID Mode

PID Mode

Betaflight Notes

BetaFlight Notes

Like most things, there are more ways to make your cake and eat it. The Chrome extension is helpful when bouncing back-and-forth between systems/releases/drones etc. I run Big Sur MacOS, Ubuntu Linux and a Win Server 7… it’s handy here, as the config remains the same, helps to maintain a certain sense of sanity. Especially when you’re a NOOB.

Two, from time to time, I run my Win7Server via MS Remote Desktop or Linux instance via Oracle’s Virtual Box. One advantage might be number of USB ports available… as you know, most MacBook Pros are limited to 3 of 4 USB-C ports. Unless you run usb ports, which I don’t care for (B.S. but that is for another day). Anyhow, regardless of how you run Betaflight, be aware of the nuances, versioning and pitfalls with each new iteration or release. T

ake notes, take screenshots, vlog about it… anything to help you remember the ‘deltas’ (change) over time. These will come in handy the next time you crash or repair your drones. Notes and support can be found here: Betaflight – Github Notes/Docs Moreover, issues came up when I swapped AIO boards, soldering power and reconfiguring modes. For more information, I posted more about the config, various configs like EmuFlight and BLHeli, look for 8/17/2020 post – Hack’r-A-Thon//

As usual leave a comment below, let us know what you’re thinking?

Lego Base Mod 2

iPad Tablet Base

Workshop Side Projects (2)

Lego Base Mod

Lab Work – Lego Device Housing or Base

Lego® Base Mod update… it’s been awhile since I’ve posted any information or updates on the tablet/device base, so here it is base mod 2.

  • Situation – think fast, tablet housing. Need a handsfree, desktop friendly table housing.
  • Challenge Lego Base Mod 2 – build a tablet housing (landscape orientation only) to house an iPad. Regardless of what model or make, we had an iPad, make something that will work in 5 mins. Go!
  • Accessible materials – Legos®, Toothpicks, Pipe cleaners, various
  • Go!

While the Lego Base Mod 2 challenge is primarily for prototyping, try it for yourself. I’ll pull this forward, as I talked about buying bricks 300 pcs set or in bulk (4lbs) if need be. It’s handy to have bricks and Lego parts around the shop, a few bricks, some connectors and you’ve got you very own DIY project build. If this isn’t your style, we recommend getting your hands on the Brenthaven.

I’m pulling this content forward, second edition accounts for ‘tipping’ and/or stability issue, number of bricks, screen angle and orientation. Issues, devices would tip or fall forward/backward depending on how the user might set the device. Reduced a few bricks, however most were repurposed as support columns or ‘feet’ which helped acute screen angles. Moving forward, mod features portrait and landscape viewing. Caveat, charging cord need was nixed, user will have to set the tablet down when charging or charge in landscape only. There will come a point, at some point, we will include a charging cord mod down the road. Previous Side Project Lego Tablet Build article for reference. Or just start here, let’s check out a Lego mobile board housing! Or model train depot!

As usual leave a comment below, let us know what you’re thinking?

Lego Train Depot

Project – Solder Station Build

AC Gilbert Lego Train Depot

Train Depot - Lego Brick Build

Lab Work – Ready For Service

BOOM! Soldering Station Done

It’s always great to have Legos handy, especially for building the Lego Train Depot. This model features a big smoke-stack and a unique, oblong, and somewhat unstable shape. This is where Legos come in handy. With a few blocks, you can create your very own DIY solder station. You can buy a 300 pcs set or purchase Legos in bulk (4lbs) if necessary, along with some connectors. You can find sets at garage sales or use ones you already have in storage. Look for bargains to gather the pieces and parts needed for these projects builds using Lego bricks..

For this article or application, I believed that stability would be crucial. We needed something to immobilize and stabilize the train while it sat on its top. Ironically, the train spent more time upside down than right side up. This allowed us to solder the necessary wires, clean debris, and wipe away the age. Yes, the model train spent most of it’s time on the upper ‘casting’ (locomotive mold) so that we could access the electronics housed within.

Depot Pics
train truck wheels Lego Depot

Train Wheels

train electronic, re-solder

Re-solder

Do you enjoy Lego, Lego building, etc.? Leave a comment below and let us know what you’re thinking!

Debian Buster

SnapDragon 410c Running Debian OS

Debian Buster

Debian Buster Running on Snapdragon Board

Lab Work – Running Debian SnapDragon

Full Update: Flashed Debian Buster, installed, updated and running on the Qualcomm Snapdragon 410c.

Full run down avery cool step forward in running a Debian ISO on a Snapdragon 410c. Two IoT devices running Debian the same way. Speed and performance are fantastic, clean and uneventful. However, as with anything, problems come and go. The issues I encountered were minor Uneventful, minor, minor issues… more user related. Versus, compatibility issues. For example, I ran into an apt-secure(8) issue, among other minor open source hardware/software compatibility issues. Some research helped me find the solutions I needed. These minor issues shouldn’t deter anyone from flashing Debian on an IoT device. This is the puzzle or strategic side of technology that I enjoy. It’s all part of the territory. Instead of uneventful, it should be described as smooth sailing, as sailing has its own challenges.

In hindsight, it’s been a l while since I used Debian, so you have to ‘roll with the punches’, minimizing the damage or redirecting the challenge. Like most IoT device installs, you have to work through the error codes and fix what you can as the optimal scenario unfolds (flashing Debian onto a mobile/IoT device like SnapDragon or RPi).

Overall, things are running as expected. Next on the list is a full upgrade/update for the trusty Raspberry Pi4B.

As usual leave a comment below, let us know what you’re thinking?

Galaxy s10+ Damage Video

Galaxy s10+ Damage Video

Nokia 3310

Gear – Galaxy s10+ Damage Video, hot swap for the Nokia 3310

A Galaxy s10+ Damage Video… Time to switch to backup to the backup phone, Nokia 3310, as the Samsung S10+ lost power, its glass is damaged, and more.

The Samsung Galaxy S10+ is now DOA at this point (time of post), damage is  beyond repair (insurance will cover a replacement). So, it’s time for a phone swap, the video is short, showing the S10+ damage, but more importantly, we’ve got a back up phone ready to go. . Time to send out the old Samsung S10+ to be replaced and swap in a fan favorite, the Nokia 3310 3g version. Let’s move on, the new version, same old workhorse of a phone. Never would I think of swapping a Nokia for a Samsung… However, no phone, means no business. The S10+ is/was in this case, a great smart device. The only hang up is the Google-fied version of a Samsung Phone. Moreover, I can’t get much out of it if you don’t have a Google account to shop, download and run apps on the phone.

The Galaxy s10+ Damage Video doesn’t show the internal damage all that well, more the surface screen and lack of ability to show a picture on the screen. Let’s change that, with a Nokia swap.

Next, these phones are legendary, long battery life – check, cool games – check, texting/sms – check, radio – check. What more could you possibly want out of a smartphone.  Did I mention it can even take a fall from 5ft (assuming normal drop patterns and free fall speeds etc.,)? This Nokia can take a lot of punishment. Batteries are replaceable too! Finally, a moment of nostalgia,  I remember those days, unlimited talk, text, snake… back up battery just in case.

Finally, I wonder why the world moved on from smartphones like the 3310? Well it’s time to get back to work, Nokia swap done and now its time to make some calls.

EMAX Fix – Part 1

EMAX Repair Start

Hack-A-Thon Part 1

eMax TH2

Lab Work – EMAX Fix – Part 1

On The Bench – TH2

Assess The Damage, Teardown

Back from the airfield, EMAX Fix – part 1. Be sure to check out the rebuild of in this series in the EMAX Quad Motor Rewire Video posted just before.

The airfield was clear, with no traffic, especially over in the helicopter and quadcopter area, so we were good to go. I unpacked the TH2 from its flight bag, got it out and up in the air with no problems.  After a final check of the batteries and controller, we were ready to go. The weather was clear, and according to the flight radar, it was a clear day with mild temperatures and wind gusts of around 2-5mph. So, up we go!

Teardown
Reattach Antennae

Reattach Antennae

Solder Antennae

Solder Antennae

Antennae Position

Antennae Position

Lift is good, strong, and perhaps the easiest part of controlling the drone in flight. These drones when properly tuned , offer a smooth and vanilla flight experience. Be sure to check out the binding process using BetaFlight to bind/connect the flight controller to the remote.

There are a lot of things happening at once when flying the EMAX drones. You have to be mindful of your location, both as you ascend and descend. The flight went well, as planned/expected. I did a few loops, full power, turns, and hard bankings just to set the pace. Don’t forget to check the battery warning before your flight.

Power Leads, LED’s
blank

Clip Leads

blank

Resolder Leads

blank

Clean Power Leads

blank

Set Leads Properly

blank

LED Seated

Now, at this point it was time to bring the TH2 home safely. As you can imagine, trouble came knocking. Damage report, minor issues included 2 LED strips out, severed antenna, severed power leads loose (+positive lead), and burned or malformed poly-frame. We fixed the issues by clipping and prepping for new wires, ordering new LED strips and poly frame, replacing the antenna, re-soldering leads, and shrink-wrapping wires where applicable.

Similar Emax status update, time has moved on since the original article and I wanted to share additional Emax content where applicable. If you’re looking for Emax content,  give these a shot (in reverse order from this postings date) – ReFit Emax Flight Controller, Emax Fix Part 1 (this article) and Part 2, Quadcopter Rewire, and the TinyHawk 2

Wrap Up Part 1

Find EMAX parts, and more, through our Amazon Affiliate links, or visit the  EMAX – US Store. For additional reference, check out the UAV Performance software used to update and run the EMAX TH and FRSky Taranis QX7s controller or more from the devs of Betaflight. Own it and have fun!