Max Neo Back Plate

Wrong Parts, Wrong Parts Shipped And Received

Old Rail Cart

Back Plate and Rail Wheels

Lab Work – Working Through The Challenges Associated With 3d Printers, Printing, Upgrades and More

Relieved my Max Neo Back Plate, the long awaited parts are on the truck this morning

Quick update, all the parts needed to update the Ender 3 Neo Max to run TPU filament through the new, upgraded parts are in. They are within arm’s reach and ready to be installed to complete the initial TPU build.

Unfortunately, I want to go on record and share a warning. I will post the tear down at some-point. So, the essence of the warning is to be careful what you order. Makes sense, right? Cross reference and cross-check OEM parts, refer t your 3D build, and ensure fit and compatibility.

Build progress has stopped because we have the wrong assembly cart, ideally we should have the Max Neo Back Plate, or back plate. The plate configuration (proper mounting holes, size, shape) is off. If you’re new to the site, check out the Max Neo challenges in the Output archives… For those who just want to see the TPU rebuild go here, but understand his – we had a few prints that went sideways. By sideways, I mean the extruder was found buried in filament, grinding away at the build plate.

What’s Next

Ultimately causing a meltdown, and plate parts found elsewhere etc. Prior to the blow out, we have a few successful TPU test builds are in hand, but are error pron. More like the standard build (Ender 3 Neo Max Bowden Extruder setup, standard build from the factory) minus the upgrade, if you can believe that. Please note that sometimes you have to ‘break’ things to truly figure out the right path or change paths, so to speak.

Anyhow, not to belabor the point here, but, we have all the necessary parts to start rebuilding this machine with the correct parts and extruder. This will allow us to build more ‘things’ with an array of filaments.

Practice 20 Mins A Day

Learn The Guitar, How To Play Videos; Just 20 Minutes A Day

Nose To The Grind

Lab Work – Grinding Out Practice Time, Self-Improvement

Today, I added strumming the guitar ‘guitar grind’ back in the mix, hence the focus on 20 mins a day. Grind you say?

Yes, the grind. I’ve never been musically inclined, nor formally taught, trained or had a significant amount of time to dedicate to the craft. So, in order to chip away at this theory of the ‘grind’… today, I’ve found 20 – 30 minutes (per day) to pick up the guitar and learn something; anything. Whether it be lessons, chord progression, song practice, music theory, finger position, scales, strumming and more. Like I said, just trying to chip away at the rust, if there was any rust built up over the years.

Check out my recent post on the D’Addario medium celluloid picks. I’ve found them to be useful when dealing with finger slippage, mostly due to sweat. I also added Vincent’s post on 50+ Easy Guitar Songs for Every Beginner. As a beginner, novice I am. Not horrible might be away to describe the journey.

Online Resources, Content Creators

The lessons and songs plays nicely in the sandbox, guitar in hand, for 20 minutes a day. They cover “I Wanna Be There” by Blessed Union Of Souls, “Three Little Birds” by Bob Marley, “3am” by Matchbox 20, “Learning To Fly” by Tom Petty and “Comfortably Numb” by Pink Floyd. I wouldn’t say this was easy for me as a struggling novice. Additionally, Vincent’s collection includes other online talent with distinction – a quick search, and you too can play along with @Guitar Zoom – for Chord Work via Steve Stine, @MartyMusic – for the “3am” lesson by Marty Swartz, and “The Secret to Strumming Learning To Fly” by Tom Petty, via @Lauren Bateman.

So, what am I getting at here? What’s the catch? I’ll leave you with this: Whether it’s learning the guitar outright, capo’s or guitar accessories, notes, formal music lessons, finger positions etc. from a music perspective, or general reading, try it for 20/30 mins a day. Dedicate the time to developing this habit, a new habit. Good habits are hard to find, and that’s the value in what we’re targeting in this post. Yes, this post is specific to guitar learning, and may be more about ‘writing’ for me, writers block or fatigue. I’m a firm believer in finding new skills, making new connections and pushing myself further than the day prior. Final note, I’ve had access to a guitar since college, over 20 years ago. It’s time to pick it up, tune it, and start learning today.

Good luck with your own activity to start today, grind away

Gear And Gadget Backlog

The Gadget Backlog Includes Items Shipping Soon

SHURE Mic

Magnet Switches, Extra (Shop) Batteries, Bodum Whisk, SHURE MV7 Mic, Aupus Air Duster, Klein Tools Precision Screwdriver Set, and Med. D’Addario Celluloid Guitar Picks.

Gear – More Gear On The Chopping Block

What’s that in the box, ((shake)) ((shake)) what might that be? A new shipment, what is in ‘the box’ and on the bench.

Let’s start by sharing this on the big Gadget Backlog, is currently in progress, as space is somewhat limited at the moment. More information on that will be coming soon. As for batteries, I have a few Optima Red Tops ready to go, along with some outback welding where necessary. It’s fitting to mention magnetic tools and switches in this context. Yes, super strong magnets that can be switched on and off with a swift turn of the hand or a switch-type mechanism. This is a very cool item to have around the house, shop, or off-road adventures.

Angle Clamps, Mag  switches and More Welding Tools

I’m curious to know if the welding community has a preference for welding square/angle holders, clamps, plunger/light switch types, magnetic holders etc., perhaps at no cost. Obviously, if you’re out on the trail, off-roading, doing trail break-fixes, integrity and rigidity might take precedence over OEM specs on angles or manufacturer measurements. When it’s time to getting your off-road rig off the trail, would something like this help to bring your efforts in line with those manufacture specs per say. Anyhow, these switch magnets might be handy to have around the shop. Various types – Angle Clamps, Magswitch Clamp, Stackable Magnets or Adjustable Angle Magnetic Welding Squares.

So, let’s discuss cover what has been unboxed… the Bloom Frother. As you know, the hand mixer needed some adjustments. A few screws, new batteries, some isopropyl alcohol… and we are back in action. You all know I’m a big coffee and tea enthusiast, but if not, that’s okay too. I like my coffee and tea with a few pinches of Sugar in the Raw, and depending on the time of day, I may add some half-and-half to adjust the temperature.

There are a few handheld frothers out there in various color and materials… the Bloom is now revived, with new batteries and ready to mix. So, I am please with the purchase for now. I will provide an update on the long-term usage of the Bloom fix. I must admin, an alternative option might be the Bodum Schimuna Whisk, which has a piqued my interest. For those of you in the market for a micro whisk/frother, the Bodum Schimuna might make a great client gift at some point.

SHURE and Aupus

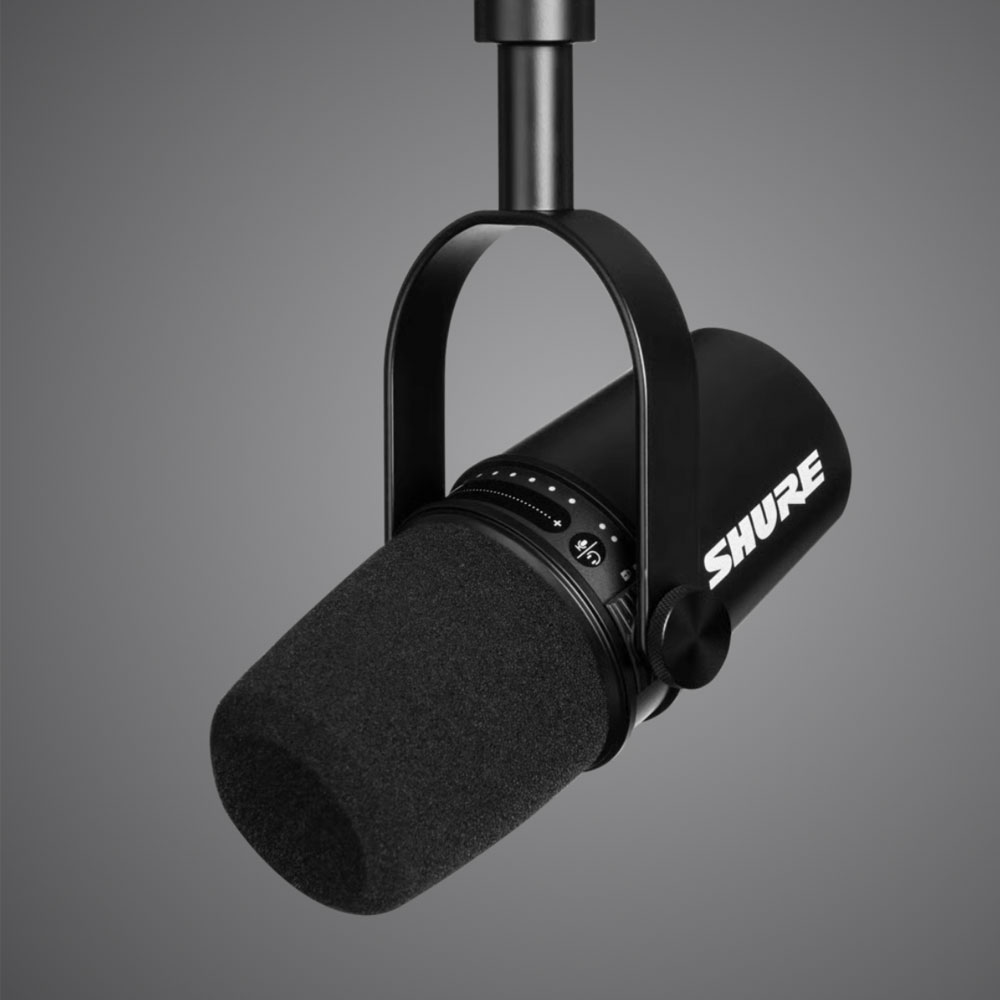
Next on the Gadget Backlog, we have the SHURE MV7 USB mic! Initial thoughts – great sound, crisp dynamic tones and easy to use. Another step forward towards audio/video experiences. The microphone includes a desktop friendly microphone stand. MacOS users will need to download the SHURE Application to mix and control the external accessory. There is a bit more work involved in getting around the need to purchase additional cables, XLR adapters or fittings. Look for a deep dive, and pictures to accompany the post.

Air Blaster

Moving on, let’s talk about ditching the air duster can for a powerful, corded air duster like the Aupus APAD15BL Air Duster. Air cans have served their purpose for many years, especially when paired with electrical-friendly wipes. While we are on the topic of air gadgets, we have more air tools coming your way – Inflators, Air Compressors, Nailers and more.  The air compressor even comes with a hand air blower tool for outdoor jobs. Like the air blower,  this plug-and-play air cannon offers variable speeds, cleaning tools, and filters. This small, office-friendly tool is handy to have in and around the shop as well. While we are discussing gadgets and tools for the shop/office, we are enhancing the Makey tech tool set by adding a set of Torx screwdrivers (T3 – T10) – Tekprem Torx Screwdrivers.

One downfall I’d like to mention is the integrity of the star and Torx bits. Torx and star bits are delicate and can easily get damaged. A word of caution you have to be careful with nano screws and give it time. Consider replacing the bits or the entire set with a set like these. What I’m observing is that screw lock… can be more beneficial here, but it does take a toll on the micro-bits used to drive in our unwind electronic screws. I’ll provide more feedback and comments on the Torx set and air cannon as we use those items on the bench.

D’Addario celluloid

Finally, last on our big Gadget Backlog list, we picked up a new guitar pick. Most are similar, with smooth or textured surfaces. The main problem I’m having is grip. After a few minutes, grip becomes an issue… it might be the ‘player’, but slippage is a problem. Sweat seems to be the culprit. Odd, huh? So, I’ve added a mixed bag of D’Addario Celluloid picks to the mix. The goal was to switch it up a bit and try something new. I still have a few Fender Celluloid Medium picks and Dunlop Max-Grip variety.

Clouds Ahead, Understand Growth

Keep It Super Simple

Sallee llc Ads - See What's On The Horizon

Learn Something New, Remove Issues, Eliminate ‘Blockers’, and Reduce Waste.

Adverts – The Value Of Vision

Aim Small, See Beyond; Eyes On Target. Take note of the clouds ahead and understand the need for growth.

This could be seen as a metaphor or warning ‘Clouds Ahead, Understand Growth’ for recognizing trouble and having clear indicators and strategies in place to maintain service on a large scale. It’c crucial to understand the value of working with a close-knit team, whether it’s a small group or a global one, that is focused on the present moment.

Understand the importance of servicing with a tight-knit crew, seeing the clouds ahead, understand growth being a single member lcc or a global team focused on the present moment. In all seriousness, the size of the team should match the scale and severity of the problem at hand. Learn how to increase your profits, learn about potential growth during challenging times. Explore different types of growth, such as stagnant growth, and find solutions based on your current resources and staff.

If I may offer a suggestion, let’s keep things simple – empower those around you, work with what you have, learn a new skill, and improve the team, whether it’s a solo project or a corporate design team, every day. We seek change, but change at a fundamental level, not just on the surface. The key is to enhance true value, the potential of humanity. Empower those around you, even in times of trouble and turmoil. Understand the scale of business and learn to navigate change effectively.

TPU Direct Drive Support

TPU Is The Goal, TPU Direct Drive Support Build

Creality TPU Filament

New Assembly, Drive Drive Extruder, Support Back Plate and Rail Wheels

Lab Work – Building and Buying Parts On The Supply List

…A few more days folks, and we can start working on the TPU Direct Drive Support build. A new extruder support plate for the Ender 3 Neo Max is on its way. Not on back order, but waiting the last piece before the rebuild can begin.

Before we proceed with installing the new parts, we discovered an issue with the back support plate (including wheels and bolts) being misaligned. After the printer ‘meltdown’ a few months ago, you can see the results of that print here. The final piece needed for the rebuild is this support back plate. There is too much play and space between the assembly and guide rails. I don’t recall there being any movement between the parts. I would expect there to be little to no wiggle room in those items. However, I can almost light off the assembly housing, extruder, and back plate from the guide rails under tension. This  was a clear sign that it was time to replace the guide rails under tension. think there is no or very little ‘wiggle room’/tolerance in those items. However, I can almost lift off the assembly housing, extruder, and back plate from the guide rails under tension. This was a clear sign that it was time to replace the support plate, bolts, and wheels to ensure an improved upgrade and fix.

New Build

Anyhow, all the pieces and parts have been removed from the initial purchase. We will proceed with the TPU Direct Drive Support build. So, for picture sake, we’ve got the frame, base, and guide rails and that’s it. All parts have been removed for the moment. ~It’s been about 3 weeks now, awaiting the OEM support plate. Ultimately, we are looking at a clean rebuild using OEM parts with a few upgrades (direct drive, replacing the Bowden extruder) to allow for TPU, Wood/Bamboo, Carbon, Metal, Organics and more.

System upgrades might come later, with the goal being more power to compensate for the downforces on the extruder head in the direct drive case. Caution, there are differences between the Direct-drive and Bowden extruders, obviously advantages and disadvantages for both… maintenance and care being the most complex for the direct-drive variety.

More Filament Types

The goal with the direct-drive ‘pivot’ is to improve heat, extrusion pressure, retraction and expand the range of filament materials. For the sake of this article, I will focus on the updated advantages and disadvantages. The comparison is between more materials, heat, pressure, and variety versus maintenance which can be a lot. I personally use the break/fix method, as parts are less expensive to replace in the printer ecosystem. It may not always be the wised choice, but sometimes breaking something is necessary to understand the machine or engineering behind it. In conclusion, having spare parts on hand is helpful. Build yourself a parts bin and consider parting out used or gently used components to reduce out-of-pocket expenses. Learn how to maintain and reuse your gadgets. Remember to fail fast when working on such equipment. Short-term expenses for break-fix situations can save money in the long run when dealing with 3D printers, drones, computers, and more

Final thoughts: Parts can help you build yourself a parts bin. Need updates, board firmware, and Slicers? Download those items here for Creality Software Support.  Part out used and gently used parts to cut down on out-of-pocket expenses. Learn how to maintain and reuse your gadgets. Don’t forget to fail fast, when working on such equipment. Short-term break fix expenses go along way when dealing with 3D printers, drones, computers and more.

Fix A Disposal Problem

We Found Food and Debris, Fixing A Disposal Problem

Disposal

No Grind, Time For A New Disposal

Lab Work – Emergency Fix, Disposal Problem

A few weeks ago, we had a minor issue with the sink disposal, hence the disposal problem. The picture here is speaks volumes about the problem we encountered. 

Once the problem was identified, it was clear that we needed to replace the disposal unit while limited pipe reconfiguration. Helps to stay on brand, or within the same brand name (size, fit and disposal location). Upon closer inspection, we found that rust had caused significant damage internally. I had to remove the seal and screws to crack open the top of the disposal unit. Honestly, I  was surprised by how worn out the unit was. It was definitely time for a replacement, and were fortunate to have discovered the issue when we did.

Disposal Parts and Install
New Install

New Disposal Install

Disposal Rust

Disposal Rust

Clean Teeth

Clean Teeth

Interior View

Interior View

Disposal Findings and Fix

Next, the title, “Disposal Problem ‘no grind’, time to replace it a new title. Unfortunately, the 1/2 replacement had a short in the wiring. Being a conscientious consumer, I decided to upgrade to the new InSinkErator 3/4 hp, which you can see here. It was a smart choice as it was the same brand and fit perfectly in the cabinet space. You can see the final installation below. These disposal units are usually plug and play, assuming that piping and plugs are readily available and identical. For this reason, I stuck with the same brand, hoping for seamless setup.

Anyhow, I didn’t want to hack away at the existing pipe or change around the pipe configuration nor the cabinetry etc. Ideally, just a quick swap,  maintain the status quo or better for the drain pipes and the sinks output. In regards to the Badger 15ss, you’ll see the upgrade comes with slight increase in HP, a plastic outer case/shell “marketing” and a sparkly new (newly cleaned) lower cabinet area for the foreseeable future. Quick work of this disposal problem.

What a mess. Moving along, fix in place, watch what you put down the sink etc. Remember to check the sealant between the disposal and connector. We had a little leakage that has now been remedied. Not bad, virtually the same machine, replaced, tools – pliers, pipe wrench, flathead, pipe tape and a small bin in case of water leaks or intrusion in the future.

Quick Fix Format

Like the quick fix format? Check out other quick fix content here such as this disposal problems fix. Learn how to descale your coffee equipment – pots and machines, fix a toilet float, clean and fixpool filter housing and filter problem or try a cell phone charging hack… Check them out!

Finally, hopefully (fingers-crossed), you can learn a thing or two. Be sure to unplug disposals, have some extra ‘shop’ towels to mop up excess water or worse, sink goo. Make sure local power outlets are off and to be safe, turn off water where applicable.

Quick Fix Nano Mixer

Nano Mixer In Hand, Let’s Get To TheFix

Clean Bloom Housing

Bloom’n Again, Mixer Back In Action

Tech And Tools – Frother Quick Fix

Quick Fix – Disassemble, Clean, New Batteries…

Quickly stir in sugar and milk, mix up your protein powders and fine particulates; all made easy with the Bloom mixer. I wanted to share a quick fix, as our nano mixer quit on us a few weeks back. Typically, the morning and afternoon espresso is ‘cut’ with a few granules of sugar and some half and half… as I get older, the trend has been ‘lighter and sweeter’… any how, here is the internal works of the mixer, teardown – a few screws, clean up, reset the metal prongs and a new set of batteries and we were back in business. Mixing up protein powder, scrambling eggs and espresso/coffee.

Just a note, be sure to keep the lower body (green structural plastic in the picture) dry if you can, there is a bit of a seal there… but better safe than dropping $20 – $40 on a new one. Again, here is the link for the Bloom variety, a micro blender or mixer with a big punch.

Secondly, we’ve tried the ‘mini blenders’ like the Bullet’s, and the hand blenders, the top of the line so to speak, with the blenders… there are advantages to all, negatives as well. The Bloom mixer is great,  now that we got a Quick Fix – Nano Mixer running again. Nice mixer for the small stuff, no need to plug anything in, or clean up pre-made cups etc. Magic Bullet style mixers were great for ‘bullet coffee’*.

Make Bullet Coffee

Thirdly, never heard of bullet coffee? Make some coffee in a Bodum or Colleti.. or choose your home Coffee Machine. See below. There are a few of the nano/hand mixers on the market, and Amazon can help you find one that fits your budget. Similarly, I’lll share links below so you can make your own ‘bullet coffee’.

*Bullet Coffee Recipe: Full Fat Butter, Raw Coconut Oil, espresso/coffee of choice – Nespresso Pods – Tokyo Vivalto Lungo, a few spins of the mixer, and you’re done.

In conclusion, check out the other quick fix articles, such as pool updates, super adhesives, outdoor lights and home improvements. I’ll probably post more about espresso machines, specifically the Nespresso machine. Stay tuned for more. Thanks!

Adventurer Lifevest

Floatation Device, Safety Vest – Class 2

Adventurer Lifevest

Purchase An West Marine Adventurer Lifevest Today

Gear – Adventurer Lifevest

Wonder through life, safe and ready to deploy at a moments notice.

Looking for a safe and effective inflatable, the Class 3 inflatable – West Marine Adventurer Lifevest (Jacket) might be just what you’re looking for out on the water, whether on a paddle board or shoreline fishing. Easy-to-wear, easy-to-work, lightweight, first class construction, make it ideal, to have on hand in and around the water. Whether you’re in deep waterline, shallow fishing spots, moderate waste deep water and/or the deep buy the latest (2 Pack) Adventurer Life Jacket ).

Lifevest
CO2

Co2

Co2

ADD Co2

Rip Cord

Rip Cord

Lightweight

Lightweight

West Marine makes a great product, offering a lightweight alternative to bulky, foam filled life jackets. It can keep you safe, even inflate itself in times of distress, when you need it most. The float vest has both automatic and manual inflation options. Co2 cartridges will be required, so it’s a good idea to have a few extras in case of an emergency. Neon and slate colors are available, keep you safe in style, with the West Marine Adventurer Lifevest.

Camping on the go, near the shoreline? Looking for a great spot to set up camp? While you’re out on the water, some other tools might come in handy, such as the UST Blast Match for a quick and safe fire. And if you’re in ned of some coffee, the Coletti Camp Pot is perfect for boiling water on the go. It’s a great way to prepare and enjoy a hot pot of coffee while out exploring.

Ender 3 TPU Update

TPU Components, Direct Drive and More

Creality Extruder, Full Assembly

New Assembly and Drive Drive Extruder

Lab Work – Bolt On Upgrades

We are updating the extruder – TPU Update. Adding a bolt-on direct drive upgrade and replacing the Series 3 full assembly body.

The TPU update is a go. First, PLA is great. TPU is better for certain applications. However, we start with PLA. If you need flexibility over rigidity it is assumed that you want to test TPU filament. First, we will replace the existing assembly body on the MAX NEO and bolt on the new extruder to address the TPU issues*. TPU requires more force to drive the flexible filament through the assembly and out the nozzle. The direct drive will help with ‘refinement’ and focusing on pushing and pulling the filament more accurately and precisely.

Creality Accessories
Unboxing

Unboxing

Drive Motor

Drive Motor

Assembly

Assembly

Remove Extruder

Remove Extruder

Unscrew The Fans

Unscrew the Fans

Assembly

Assembly

Again, in terms of next steps and the TPU Update, the update is not a *requirement,. However, after seeing enough test prints, it’s time to make the switch. Here is the bolt on solution from Creality for the Ender 3-Series, MAX NEO. Moreover, what do I mean by ‘requirement’ above? In my opinion, it would be extremely difficult to print TPU printables using a Bowden drive. I’ve tried, and it doesn’t work well. Finally, the Bowden drive doesn’t provide enough filament force and direct force to the filament through the hot end, hence the need for a direct drive motor. So, I want to emphasize that there’s no need to buy a new machine for TPU printing. Simply, do the swap and you can print both TPU and other high-temperature filaments as well.

Quick update: since this post was shared, we have received the parts for the TPU updates, allows us to begin the direct drive build. TPU filaments and prints can now be done without the necessary upgrades. Let’s get into the build and upgrade action! Side note, before we move off the direct drive action, I’d like to share other Halot updates including the Halot LCD fix and other break-fixes when adding a resin printer to your arsenal.

Stay tuned for additional photos and mini-clips covering the installation soon. In the meantime, here is a brief unboxing and assembly tear-down. Thanks!

Life In Motion And Movement

Nautilus Shells, Reeds; Motion and Movement In Nature

Nautilus

A Study of Motion, Life and Water

Artwork – Movement

As more paintings come out of storage, let’s touch on Movement. We will be sharing acrylic and oil art form in the backlog.

Check out the motion series posted under artworks, which celebrates the concept of motion in various forms – whether in life, through sound, or in other worldly ways. The goal is to capture movement, light, emotion and action.

Below you will find a mix of mixed-media and acrylic works that study water elements, creatures, the night sky, and radio signals in motion.

Move
The Nautilus

The Nautilus

Shell Of A Nautilus

Shell Of A Nautilus

Reeds Moving In The Water

Reeds Dancing In The Water

Moving Shell

Shell Reflection

Shell Structure In Light

Shell Structure In Light

Change, the alpha waves and movement

Change, Alpha Waves

Radio Wave Movement

Radio In Motion

Finally, the movement study, motion if you will, has grown over the years, more pieces than most. I hope you enjoyed the Movement study, and would like to interest you in our other works, like the human form study. To learn more, you can do a quick search (or click the eyeglass icon and search terms like ‘ artwork ‘) for the artwork we’ve made available. At some point, we will post our work to social, you can find a link here @salleecreates. If you’re not on X, sign up today!

A Sun Light Study

Sun Light

Sunset Study

Rise and Set, Sun Study

Artwork – Sun Study Series

Raise and shine! Or Another sun set, sun cascading over the rolling water, salt, and sand. Let’s start, there are a number pieces to this study, more paintings to the Sun Study, mix media pieces etc., currently unearthing those from storage. Here we have a series of light; sun/sun sets etc.

Light. These pieces focus on the light (oppose to dark) from a certain light source, the sun and how it falls on objects, land, or water. For now, the following sunset works will serve as a storage/archive for the series. Created in various sizes, using acrylics and different mediums, we delve into the exploration of the sun.

More Light
More Sun

Sunlight

Sunset Later In The Evening

Later In The Evening

Sunset On The Island

On The Island

Now let’s focus on more content, additional content/art will be added later, so please check back at some point. I’m a fan of the light and colors created at dusk and dawn; just before and after the best light for photographs.

Lastly, take a look at my latest sketches, more sketches that further define the sun study and artwork on X and progression of photos. You can also explore our pieces and artwork in the artwork category.

Piet Mondrian Composition Study

Masters Piet Study And More

Piet Study

Inspired by Abstractionist, and Dutch Master

Artwork – Mondrian Series

Mondrian, The Piet Study

First, a brief look into some work inspired by the Dutch Master Piet Mondrian (1872 – 1944). Check out the MoMA website for more information on Piet Mondrian to learn about him, his style, and the abstraction movement.

Secondly, these are the only pieces I could find, but there are others out there. In total, there are roughly 10 or more pieces like the “deconstructed” building pieces.

Next, the Piet Study series spans roughly 12 or more years, with artwork given as gifts to family members, for weddings and more. The third piece features more deconstructed rectangles on canvas, sticking to brown tones, reminiscent of terracotta. Unfortunately, these are the only two pieces I have in my possession.

Outdoor Space
Squares 1

Squares 1

Squares 2

Squares 1

Squared Deconstructed Expressionism

Deconstructed

Additionally, more on that later. I’ve got more like the first two labeled “square 1 and square 2” where the deconstructed Piet inspiration is more of a one off. Mondrian has many more like some of my favorites:

  1. Mill in the sunlight
  2.  Devotion
  3. The Red Mill
  4. Lighthouse in Westkapelle

For now, let’s us celebrate Mondrian and enjoy the artwork. Check out my latest sketches and artwork at @salleecreates for progression photos. Lastly, you can also explore other pieces like the Piet Study, those can be found under the art tag or category for artwork.

Human Form And Anatomy Study

Human Anatomy and More

Mixed Body Study

Human Form Study

Artwork – Human Form Study

Human Form Study, using acrylics and oil paints; sizes vary.

More images will follow. We will include a hand study and a tree study over the year. The main image won first prize back in college, highlighting various elements such as clouds, marketing, a human bust and the human skeletal structure. The second image is an old oil painting, created before university, while studying the bust of Alexander the Great.

The Human Form
Alexander The Great

Alexander The Great

Great Masters Study

Great Masters Study

Portrait Study

Portrait Study

Post Triptych

Post Triptych

The Woman's Body

The Woman’s Body

Just Over There

Just Over There

Hand Through Water

Hand Through Water

Hand Study Oil

Hand Study Oil

Lastly, a human form painting inspired by the famous “Girl With The Pearl Earring” by Dutch Master Johannes Vermeer ~1665. Although the famous pearl earring was hidden in this rendering, the study was an early ‘pointillism’ painting on watercolor paper. The final work was to represent the most famously painted by such names as Georges Seurat and Paul Signac ~1800. This study was very early on in my painting adventures, human form creations, and movement same as those created today. These are great starts, some have become backgrounds, textures and more playing a major role in other paintings. See those and more under the category of artwork. 

Aircraft And Airframes Study

More Aircraft, Single Engine Aircraft Study

Aircraft Study

Action At The Airfield

Artwork – Single Engine Aircraft, Acrylics

Love planes, aircraft of all shapes and sizes.

First, I have more sketches coming, one I’m working on now a Japanese Zero – A Mitsubishi A6M Zero fighter designed by Horikoshi Jiro raising to the highest levels of infamy, wreaking havoc in the Pacific Theater during World War 2. One of a few I remember studying a bit closer back in the day. The Zero, the Mustang, Warhawk and Messerschmitt Bf 109. Many, or most of them are in pencil or have been elevated to pen and brush pen form.

Next, I am currently sketching up a few new ideas, including a large hauler. The largest helicopter in the fleet, the Chinook and an F/A-18 Super Hornet flown by the US Navy Blue Angels. Someday, I will get around to painting these aircraft, but for now, I only have the sketch version. Please check out the two examples on X, via @salleecreates.

Aircraft, Airfields and Airport Accessories
Aircraft Study

Reflections

Aircraft Study 2

At Rest

Enjoy the Aircraft Study, those within this post and other works in this series. More pieces can are here under fine art or art search parameters. Be sure to check out my latest works and ideas @salleecreates progression photos.other artwork under the category named artwork in the same category.

Acrylics Indoor And Outdoor Study

Study Of Life, Acrylics Indoor And Outdoor Study

Bridge and water garden

Waterscape, Vases and Flowers

Artwork – Indoor And Outdoor Works

An Acrylics Indoor And Outdoor Study, sharing various styles, vegetation inside the house and out.

Plants, Flowers and More
Acrylics studies - Anniversary Annuals

Memory

Acrylics studies - Red Pedals

Red Pedals

Acrylics studies - Palms in the sun

Palms One

Acrylics studies - Palms in the sun 2

Palms Two

The style, at this point is my own, which has been consistent throughout my career, most recently in a study of pelicans you can find those paintings by searching Bird Study or click the link. Color is important here, makes for good acrylics (paintings, mixed media etc. and so on) including indoor, outdoor, subject matter – human, animals, creatures, energy, really anything.. For the context of this  post, color typically comes in the surreal flavor if you will, call it my self-expression or whatever, I rarely choose the real palette represented in a study or model. Again, not to be a rebel, maybe perhaps to give it a different ‘life’. To create something with “a life of it’s own or on it’s won”, I guess.

I explore the world around us, using color and space to define the setting, mood, and time. Stay tuned for more updates. Check out my latest sketches and artwork on X for progression photos, or browse other pieces in the artwork category.

Telescoping Magnetic Picker

Enbar Magnetic Tools. Need A Hand?

Enbar Magnetic Telescoping Tool

Pick Up Metal Tools, Scrap, Nails and More

Tech And Tools – Working With Metal? How About Small Screws And Bolts? Need A Hand?

Need a hand? Pick up a Enbar telescoping magnetic picker ‘pick me up’ tool.

Meet the Enbar Telescoping Magnetic Picker. This particular Enbar tool has a small magnet that extends from 7″ to 30″, making it handy to have around when you need a magnetic hand. While working on the Jeep, from time to time, a screw or bolt might find it’s way in an area where my fingers and arms simply can’t reach. Additionally, my fingers lack the magnetism needed to pick up 1″ to 2.5″ bolts tucked down in front framing tubes. (I recently ‘lost’ a bold down in the front tubing area, when changing out the headlamps and ended up recovering a star screw multiple times; it just wasn’t a good day to tinker on the Jeep.) This is where the Enbar tool comes in handy.

Enbar Tools
Enbar Magnet Tool

Enbar Magnet Tool

Enbar Magnet Tool 3

In Use

Enbar Magnet Tool 4

Magnetic

I chose Mini without a light, the small No.1 Magnet Tool. There are three others in the handheld tool lineup. Some are different in size, while others have a small light to help in tight, dark areas. Check out the Enbar tool if you’re looking for similar assistance in and around the shop or garage. Before we wrap up this article, since we are on the topic of tools, here are some other links to tools that you might need – MIG TIG Welder, Weller 70w Soldering Kit, Calipers, and Kreg Tool. Let’s check ’em out!

A handy tool for around $10*, depending on which model you choose. So, for as little as $10 bucks* for the smaller model without a mini light or ~$12* for the largest tool with a light, the Enbar Magnet tool just might be the tool to have around the house, shop or the garage. Maybe get couple – one small, one large? You pick, you pick the right ‘pick me up’ tool for your needs. Don’t forget to leave a comment or share your experience online if you choose to purchase one of these tools. It helps drive that customer review rating (4.6 stars out of 3,925 ratings as of 8/6/2023).

Travelers Experience Triptych

A Painting Series called A Travelers Triptych

Traveling Triptych

A Traveling Triptych – A Life’s Journey, Vagabond, to Scholar, and Under The Knife

Artwork – Triptych

Traveling works, national art show. The Traveling Triptych.

Firstly, the Traveling Triptych series is an exploration of color, human form, emotion, and the essence of being human; this series is called the Traveling Triptych. Painted back in the early 2000s, the works won multiple first awards, traveled coast-to-coast and remains in my private collection. Secondly, there are three distinct real reasons for each painting: 1. A vagabonds life, roaming around, living as is, looking for meaning in this life. 2. Thinking, settled now, trying to make sense of this world, striving to perfection, reflecting on life. 3. Moreover, under the knife, aging not so well these days, but needing to correct organics and better ones’ life, now sharing life’s blessing.
The Traveling Triptych – Travelers, Traveler and Experience
A Vagabonds Life

A Vagabonds Life

Thinking

Thinking

Under The Knife

Under The Knife

Thirdly, this piece or series was completed in the early 2000s as part of my undergraduate studies, particularly focusing on color theory. Likewise, I wanted to create something a bit more deconstructed, incognito and lacking form straightaway. The Traveling Triptych series includes 5 or more pictures or forms. The themes include the vagabond or nomad, the uncut, the unkept. Therefore, the one who thinks, lost in thought; pondering how things are.

Subsequently, we have a hand searching for sight, or perhaps defending sight from thought. All open to interpretation, surreal in nature. A quick tangent, check out more human elements, forms etc. via form study.  One of my favorite pieces individually and together, in the 3 part series. There are more, locked away in a sketchbook from the early 2000’s.

Crazy to think about it, more than 25 years ago, anyway. Lastly, more to come, more paintings in this style – surrealist style i.e. Dali, Parkes, and Elmore. And the like Traveling Triptych. please check back later. You can also view my latest sketches and artwork on my X for progression photos. Feel free to browse through other pieces, and the artwork category as well. Thank you!

NES F-1 Race Video

Let’s Race, F-1 Race

@WorldOfLongplays Formula 1 Race

Lab Work – Break Out The Controllers, NES F-1 Race Video

Another great option for you racing fans out there, Race F-1, F-1 Race.

Quick Take

If my memory serves me well, this game was difficult to say the least. Rad Racer was a slightly easier, more palatable back in the 80’s. Rad Racer has an F-1 car as well. But, F-1 Race was more indy car/f-1 car friendly for those of you who enjoy track racing. Also, if you can get your hands on this game, it’s a lot of fun. Turns were out of control, at least for me, probably the more difficult part of the game. Again, this is 40 years ago, so, enjoy if you can get your hands on F-1 Race today. Refresh your memory with @worldOfLongplays play-through.

It has been years since I last played F-1 Race and it may be many more before I pick it up again! I want to highlight the level of difficulty in this game. Similar to Excitebike, where I struggled with concept of temperature and engine overheating. or landing a fighter jet in Top Gun, which in both cases are critical concepts to progress in the game. So, once again, it took me sometime as a child to figure those out. Unfortunately, landing in Top Gun never really panned out nor improved. F-1 Race is different in that the game was difficult so multifaceted, multiple areas for improvement.

F-1 had similar mechanics to Rad Racer, with turns and speed being key components. I believe where I struggled most was in putting together a solid run without being distracted by other race cars. Those cars always wiped me out on the turns. Therefore, for this article it is more cathartic to recall the frustration experienced while playing this racing game. This is probably the main reason why I avoided other racing games like RC Pro Am, Super Off Road, and Excitebike, particularly those with tight, hairpin turns such as F-1 Racer and MotoGP. These were all valid reasons, possibly just due to being to young at the time.

As a young gamer (in hindsight), I’m glad I kept at it because most of the racing games turned into some of my favorites: Rad Racer, Super Off Road, Excitebike, Mario Kart, FZero… taking us down memory lane.

Let’s watch this video and others like it on YouTube Logo YouTube or check out our other videos found under the video category on our website.

GoDaddy Bounceback Services

Rolling With A Bounceback Service, Clean Up The Email Issues

Bounceback Services vis CheckSpam

Report Your Findings, A Bounceback Option

Tech And Tools – Email Support

Report A Bounceback Error

For those of you using Godaddy for hosting, consider trying GoDaddy Bounceback Services. Visit the Report A Bouncebak Error site for more information. If you need to investigate a rejected or bounceback message, or require more details from your hosting provide, this mini site can be useful, especially when troubleshooting returned emails. The same goes for Hostgator users – HostGator Bounceback Support is available as well.

If you are experiencing email issues, such as emails bouncing back, we encourage you to address the bounceback messages independently. However, proceed with caution and be mindful of the steps and actions you take. The tool requires raw data (source messages data) to function correctly. Moreover, understanding diagnostics, diagnostic system errors, and spam rejections may require some time. Stay patient and persistent.

To do this, open your local mail client suck as Outlook, Apple Mail or Gmail. The mail client app will offer a ‘view’ or ‘view message’ option. Choose to ‘view’ header data on a transmission, including both successful and unsuccessful sends.

If you find yourself in a hypothetical scenario, you may need to review a message that was likely transmitted correctly. This will be beneficial for future troubleshooting, as your familiarity with the interface will be useful. For instance, for those of you using MacOS, follow these steps: Open Mail, Find and Click Mail in Question, with the mail highlighted, Go to View, Scroll Down to Message, Chose either All Headers or Raw Source depending on the service that is requesting it . DIYers can also find online resources to troubleshoot on their own before contacting their hosting affiliate.

Report A Bouneback Error

The GoDaddy Bounceback Services website, also known as the Report A Bounceback Error site, will ask for .EML files from you. Once you have the message headers or raw sources, you will need to provide them to the bounceback tool. Save these files locally, and ensure they are saved in a readable format. Simply rename the files with the requested file type.

Other tools that might help while you’re digging around. Do you fuzz? Screaming Frog or SEMRush? Email issues? MX Toolbox, flush your system and server cache often. Delete old accounts, and clean up the clutter. Fix email risks and issues associated with email services via similar bounceback services.

Simple right? If you can reach get to this point, most Tier 2 or support centers can investigate the email in question in greater detail. Although there is no standard SLA (Service Level Agreement) the typical timeframe is 12-24 hours depending on the order of magnitude; most will respond within a few days, some within a week, assuming limited or non-paid tech support.

Investing In Your Business

Small, Smart Investments In Your Business

Invest In Your Business Energy: Finding Small Wins, Eyes On The Target, And Focusing On The Next Win

Methodology – Iterative and Incremental, Design, Build, Release

Quick tip, there are three simple points to remember to drive home incremental successes while investing in your business. Aim small, keep your eyes on the target, and have the awareness to see beyond.

When investing in your business: aim small by finding impactful wins that can positively change the customer experience. In other words, focus on cost-effective ways to enhance your customers’ experience. Keep your eyes on the target by bringing focus to your work, understanding the value of customer diversity and how their opinions and experiences can improve your products and services in the market.

So, take a closer look at the images for a moment. You might be wondering, what is the significance of a stylized eye? It’s an illustration of a human eye, zoomed in, with cool colors and hard edges. Why choose an eye as the focus?

Vision, Cost Of Doing Business

Vision, is the key takeaway here. Having the ability to ‘see’, whether right or wrong includes seeing through touch (for example, using braille). This concept is especially important for those with vision impairment, as the ability to  perceive the value in a product or service is crucial. Do your customers truly understand the value of your products, services, and, more importantly, the experience they will have when engaging with your product?

Next, it is important to have the awareness to see beyond the trials and tribulations of day-to-day life. Understanding the ups and downs in the market, the ebb and flow that takes place, and the lifecycle of your product is crucial. Finding satisfaction in learning from the experience, the challenge; the wins. Testing is at the core of what we believe is the ‘learning’ process, providing value gained from focusing on a test, learning from it, and applying the outcomes.

A final point to consider when thinking about ‘Investing In Your Business’. is to consider resources and, depending on your budget, testing costs. Find ways to test your customer base and learn from their experiences. Understand how those ‘events’ can change and improve your products lifecycle. Alternatively, if you are interested, explore the concept of transformative simplicity.